
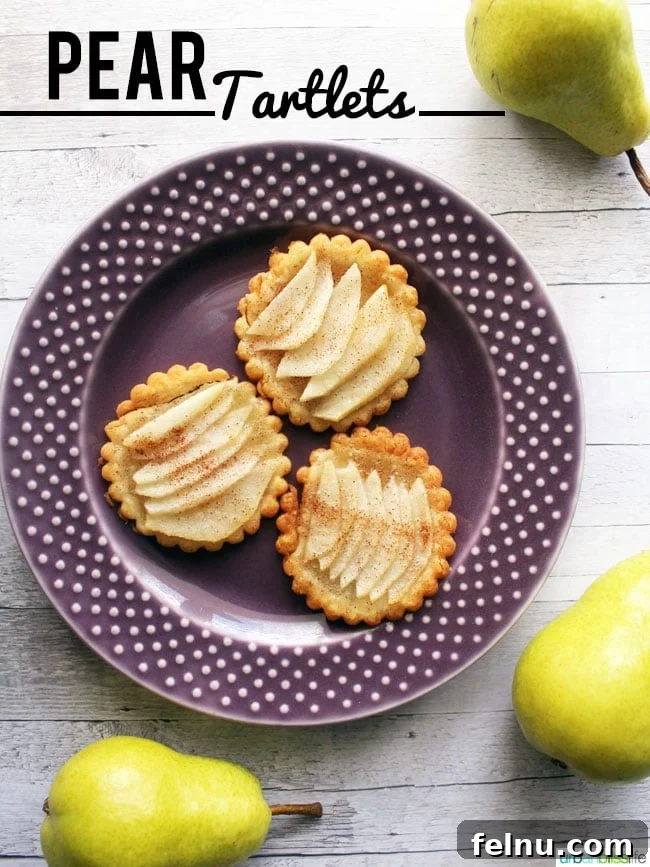
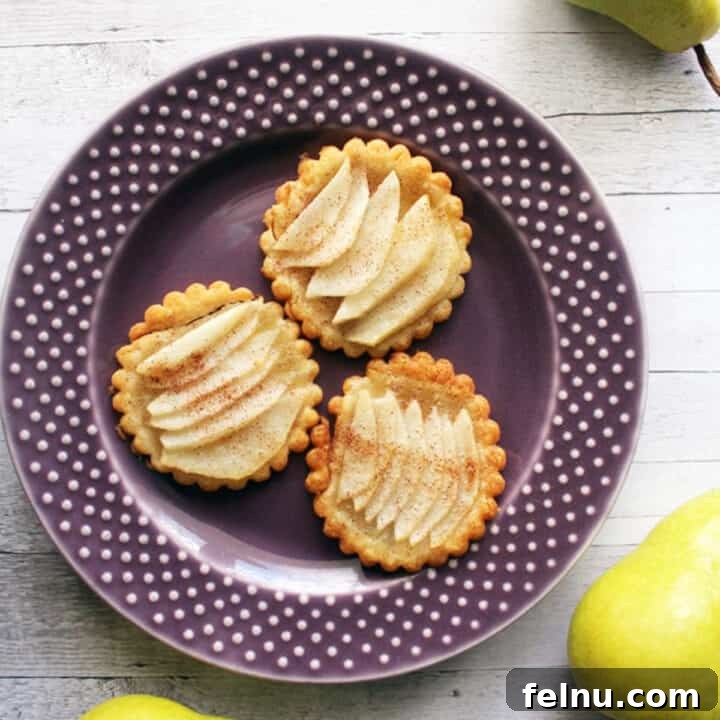
Welcome to the ultimate guide for creating incredibly warm and delightfully crunchy Pear Tartlets – a perfect dessert that truly encapsulates the cozy essence of cooler autumn evenings. Imagine a buttery, flaky crust embracing tender, spiced pear slices, all ready in under 30 minutes! These individual tartlets are not just a treat for the taste buds; they are a feast for the eyes and an absolute breeze to prepare, making them an ideal choice for last-minute entertaining or a comforting weeknight indulgence.
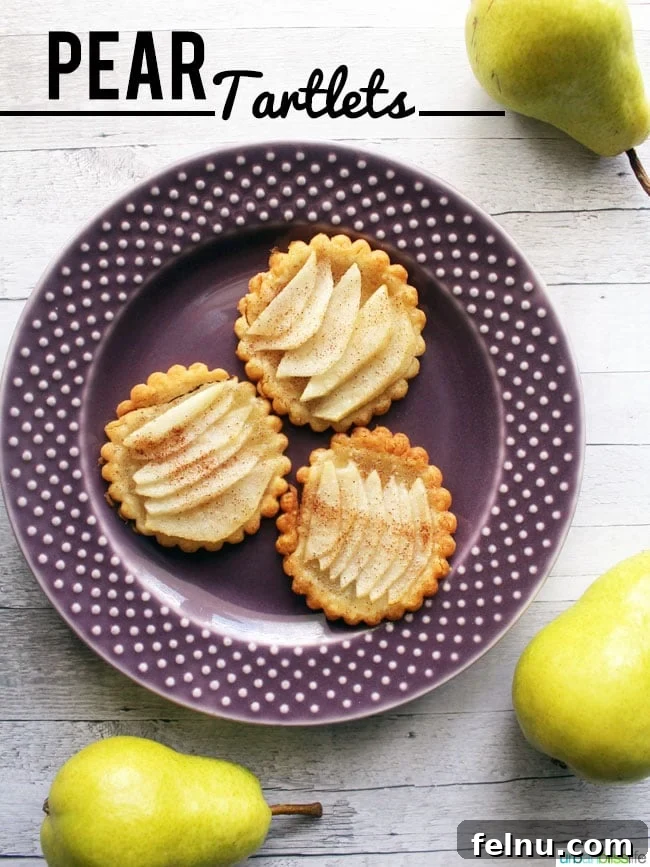
The beauty of these quick and easy pear tartlets lies in their effortless preparation, largely thanks to the smart use of store-bought pie dough. From start to finish, you’re looking at a mere 30 minutes, with only about 15 minutes dedicated to active prep (mostly slicing those luscious pears). This makes them an absolute lifesaver when unexpected guests drop by, or when you simply crave a gourmet-level dessert without spending hours in the kitchen. These mini fruit tarts offer a delightful balance of sweet, spicy, and buttery notes, making them a fall dessert staple you’ll want to revisit again and again.
Beyond their speed, these pear tartlets boast a charming rustic appeal, making them appear far more intricate than they actually are. Each golden-brown pastry cradles a beautiful fanned arrangement of pear slices, glistening with a hint of cinnamon sugar – a truly inviting sight. This recipe is designed to be approachable for home bakers of all skill levels, promising consistently delicious results every time. Get ready to impress your friends and family with this wonderfully simple yet elegant dessert!
Why You’ll Love These Easy Pear Tartlets
There are countless reasons why these individual pear tarts will quickly become a favorite in your dessert repertoire:
- Incredibly Fast: With just 15 minutes of prep and 15 minutes of baking, you can have a fresh, warm dessert on the table in half an hour. Perfect for busy schedules!
- Effortlessly Simple: Utilizing pre-made pie dough significantly cuts down on complexity, making this recipe accessible even for beginner bakers.
- Seasonal Delight: Pears shine in the autumn months, and this recipe highlights their natural sweetness and delicate texture beautifully.
- Individual Portions: Tartlets are inherently elegant and easy to serve. No slicing or messy plating required – everyone gets their own perfect little dessert.
- Versatile Serving: Delicious on their own, or elevated with a scoop of vanilla ice cream, a dollop of whipped cream, or a drizzle of caramel sauce.
- Minimal Ingredients: You only need a handful of basic ingredients, many of which you likely already have in your pantry.
- Crowd-Pleaser: The combination of warm fruit, flaky pastry, and sweet spice is universally appealing and sure to be a hit at any gathering.
These tartlets strike the perfect balance between comfort food and sophisticated dessert, making them a truly special addition to any meal.
🛒 Ingredient Notes: Crafting Your Perfect Pear Tartlets
This delightful recipe prides itself on its simplicity, requiring just a few key ingredients to create something truly special. Quality ingredients, even in a short list, make a world of difference. Here’s a closer look at what you’ll need and why each component is important:
- Pears – The star of our show! I highly recommend using firm, ripe pears such as Bartlett, Bosc, or D’Anjou. These varieties are known for holding their shape wonderfully during baking, ensuring your tartlets have a pleasant texture without becoming mushy. When selecting pears, look for ones that are firm to the touch but yield slightly when gently pressed near the stem. Avoid overly soft or bruised pears. Four medium-sized pears are typically enough to yield sufficient slices for about 15 tartlets, but it’s always good to have an extra on hand just in case.
- Pie Dough – This is where the “fast and simple” magic happens! Store-bought pie dough is an absolute game-changer for this recipe, saving you significant time and effort. Look for pre-rolled pie crusts in the refrigerated section of your grocery store. Most packages come with two crusts; you’ll typically need one for this recipe (reserving the second for another batch or a different dessert). If you’re feeling adventurous or prefer a homemade touch, you can certainly use your favorite pie crust recipe, but ensure it’s rolled out thinly and chilled before cutting.
- Butter – A touch of melted butter is essential for achieving that gorgeous golden-brown crust and adding a rich, nutty flavor that complements the pears and cinnamon. Unsalted butter is usually preferred in baking as it allows you to control the salt content precisely. If you only have salted butter, reduce or omit any additional salt in the cinnamon sugar mixture, if applicable.
- Cinnamon Sugar – This simple mixture provides the perfect warm, spicy sweetness that transforms humble pears into an irresistible treat. To make your own, simply combine about 4 tablespoons of granulated sugar with 1/2 teaspoon of ground cinnamon in a small bowl. Adjust the cinnamon to your preference – a little extra can enhance the autumnal flavor profile beautifully. You can even add a tiny pinch of nutmeg or cardamom for an extra layer of spice, though cinnamon alone is perfectly wonderful.
That’s it! With these four simple ingredients, you are well on your way to creating a batch of impressive and delicious pear tartlets that taste like they came from a gourmet bakery, but were made with love (and ease!) in your own kitchen.
✅ Step-by-Step Instructions: Crafting Your Pear Tartlets
Follow these easy steps to create beautiful and delicious pear tartlets. Remember, precision in preparation will lead to the best results!
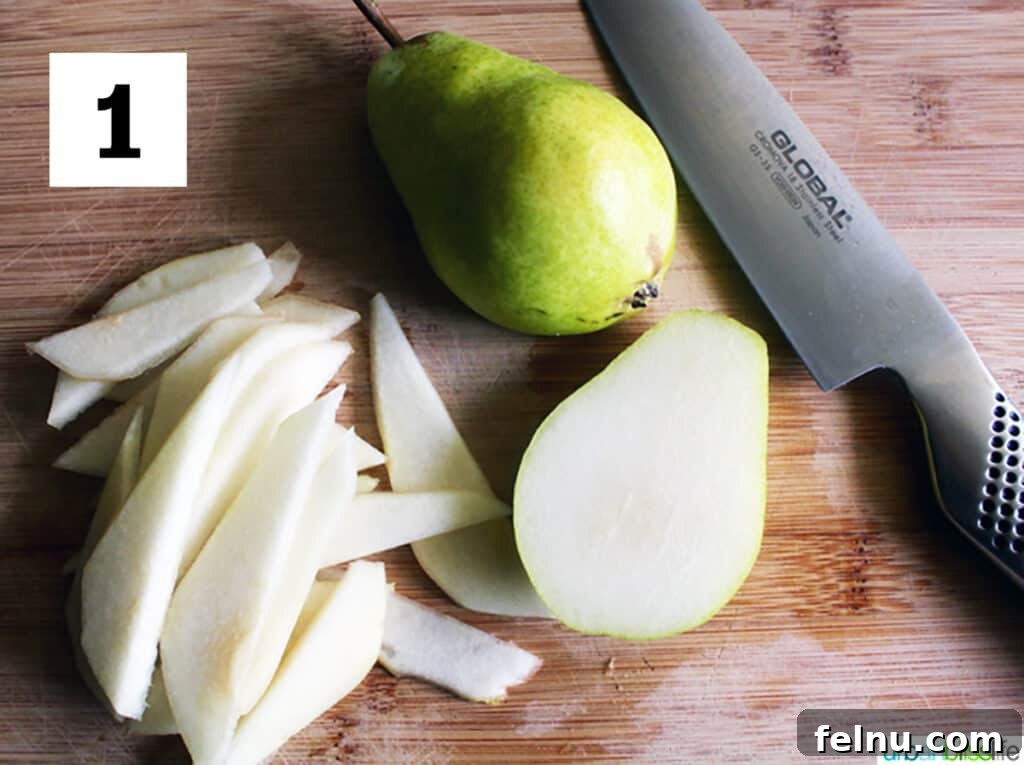
- Prepare Your Pears: Begin by washing and carefully slicing your small pears into very thin, uniform slices. Aim for slices that are about 1/8 to 1/4 inch thick. Thinner slices will soften more evenly and fan out beautifully. Depending on the exact size and shape of your pears, you may need to use your knife to trim some of the ends to ensure they fit neatly onto your pie dough circles. Set these aside while you prepare the dough.
- Handle the Pie Dough: Unroll your store-bought pie dough carefully. If the dough is too cold directly from the refrigerator, it might crack and break when unrolled. Allow it to sit at room temperature for about 10-15 minutes to become more pliable. If any cracks or tears do occur, gently use your fingers to mend them together, then lightly roll over the patched area with a rolling pin to smooth it out.
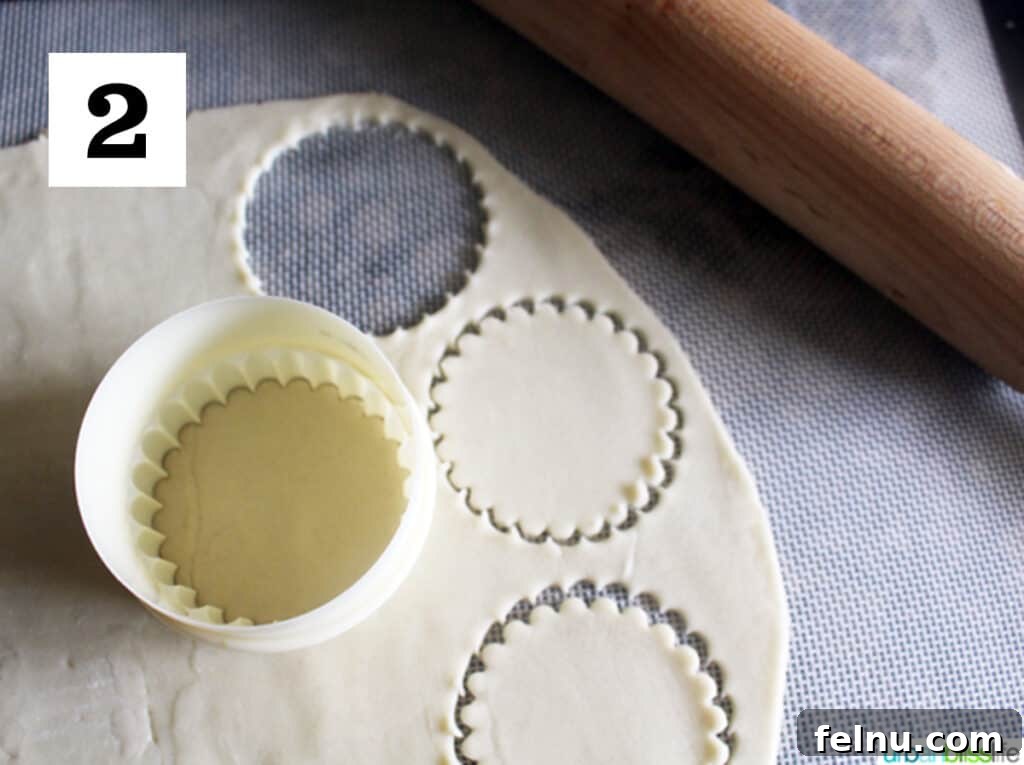
- Cut the Dough Circles: Using a round cookie cutter (approximately 2.5 to 3 inches in diameter is ideal for mini tartlets), cut out as many circles as possible from the pie dough. Gently gather any dough scraps, re-roll them, and cut additional circles to maximize your yield.
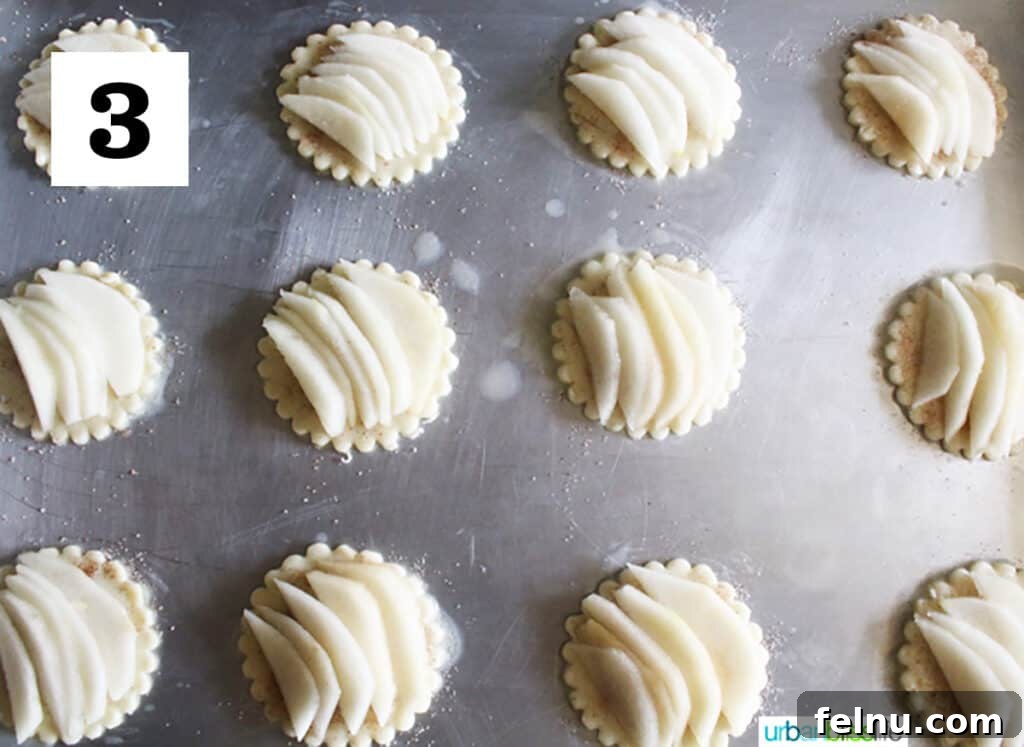
- Arrange on Baking Sheet: Lightly grease a baking sheet or line it with parchment paper for easy cleanup. Carefully transfer the dough circles to the prepared baking sheet, ensuring they are spaced about 1.5 to 2 inches apart to allow for even baking and expansion.
- Brush with Butter: In a small bowl, melt the ¼ cup of butter. Using a pastry brush, gently brush the surface of each pie dough circle with a thin layer of melted butter. This not only adds flavor but also helps the crust achieve a beautiful golden hue.
- Sprinkle with Cinnamon Sugar: Evenly sprinkle a generous amount of your prepared cinnamon sugar mixture over each buttered dough circle. This layer will caramelize slightly and create a wonderfully sweet and spicy base for your pears.
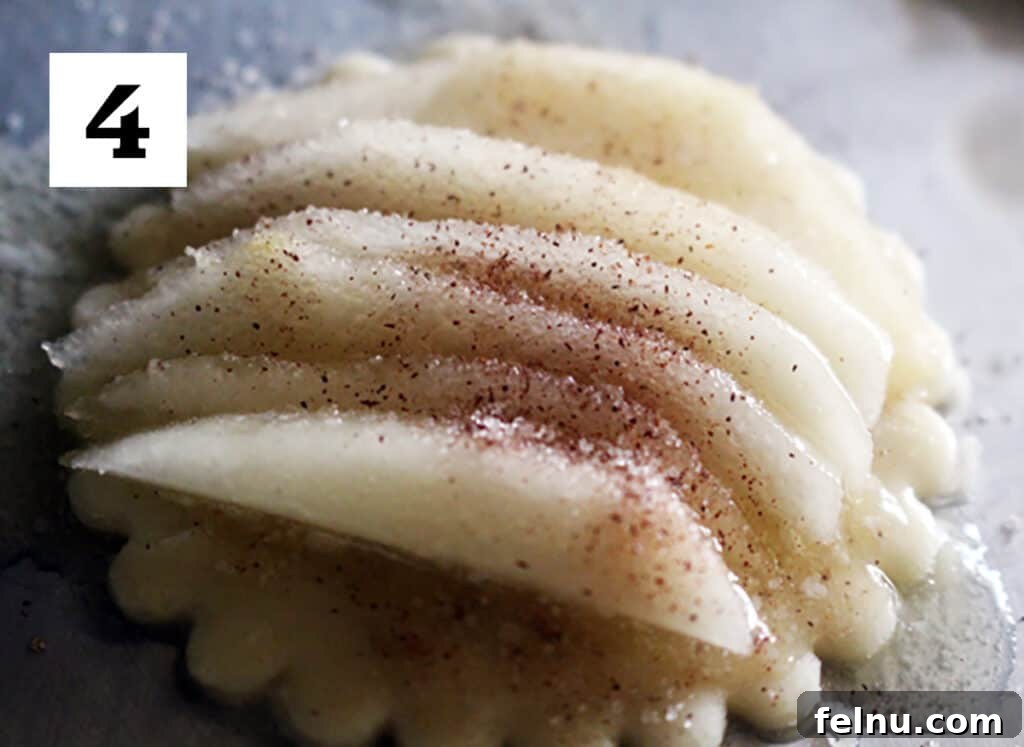
- Fan the Pear Slices: Now comes the artistic part! Arrange 3-5 thin pear slices on top of each dough circle in an elegant fan formation. Overlap the slices slightly, starting from the outer edge and working inward, or arrange them in a slightly spiraled pattern. The number of slices will depend on their size and the diameter of your dough circles.
- Final Cinnamon Sugar Dusting: For an extra boost of flavor and a lovely caramelized finish, lightly sprinkle a bit more cinnamon sugar over the fanned pear slices on each tartlet.
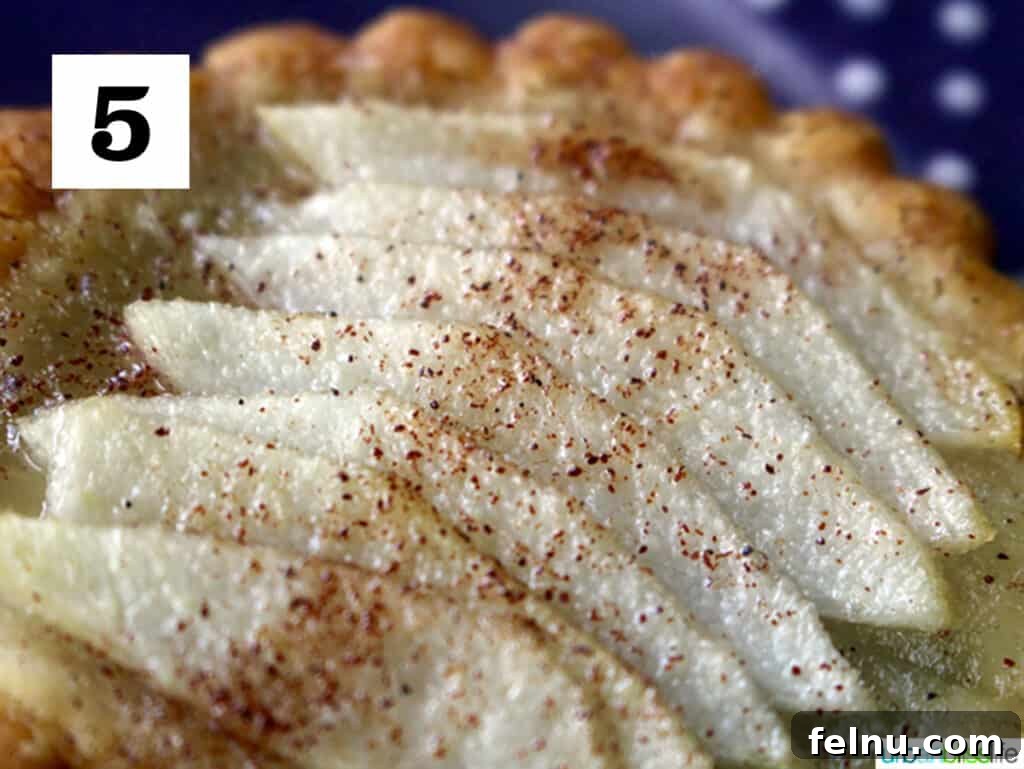
- Preheat Oven & Bake: Preheat your oven to 350°F (175°C). Once preheated, carefully place the baking sheet into the oven. Bake for approximately 15 minutes, or until the edges of the pie dough are beautifully golden brown and the pears look tender. Keep an eye on them towards the end of the baking time, as oven temperatures can vary.
- Cool and Serve: Once baked, remove the tartlets from the oven and allow them to cool on the baking sheet for about 5 minutes. This cooling period helps them set and makes them easier to transfer. Serve warm, enjoying the crispy crust and tender, sweet pears.
Tips for Success with Your Pear Tartlets
While this recipe is straightforward, a few expert tips can ensure your pear tartlets turn out perfectly every time:
- Pear Firmness is Key: Always choose pears that are ripe but firm. Overripe pears will release too much moisture and turn mushy during baking, affecting the texture of both the fruit and the crust.
- Thin Slices are Best: The thinner your pear slices, the more evenly they will cook and the more beautifully they will fan out. A mandoline slicer can achieve uniform thinness effortlessly, but a sharp chef’s knife and a steady hand work just as well.
- Dough Temperature Matters: Allow your refrigerated pie dough to warm up slightly at room temperature (about 10-15 minutes) before unrolling and cutting. This prevents cracking and makes it much easier to work with. If it gets too warm and sticky, pop it back in the fridge for a few minutes.
- Don’t Overcrowd the Pan: Give your tartlets enough space on the baking sheet. Air circulation is crucial for achieving that desirable golden-brown and crispy crust.
- Watch for Doneness: Ovens can vary. Keep an eye on your tartlets during the last few minutes of baking. You’re looking for beautifully golden-brown edges on the pastry and tender, slightly caramelized pear slices.
- Customize Your Spice: While cinnamon is classic, feel free to experiment with a pinch of nutmeg, cardamom, or even a tiny amount of ground ginger in your cinnamon sugar mixture for a different flavor profile.
❓ Recipe FAQs: Your Pear Tartlet Questions Answered
This recipe is designed to yield approximately 15 mini pear tartlets. The exact number can vary slightly depending on the size of the pastry cutter you use. For instance, if you use a 2.5-inch diameter cookie cutter, you can typically make about 16 individual adorable pie tartlets from one standard sheet of store-bought pie dough, plus any re-rolled scraps.
For baking, it’s crucial to select pear varieties that can withstand high heat without breaking down and becoming mushy. Excellent choices include Bartlett, Bosc, and D’Anjou pears. These types maintain their firm structure and appealing texture even after being baked. Additionally, they tend to retain their lovely color and don’t brown as quickly after being sliced, which is a bonus for presentation.
While these tartlets are best enjoyed fresh and warm from the oven, you can prepare certain components in advance. You can slice the pears a few hours beforehand and keep them in a bowl of lightly lemon-acidulated water (to prevent browning), then pat them very dry before assembling. The cinnamon sugar mixture can also be prepared days in advance. Assembled but unbaked tartlets can be refrigerated for up to an hour, but for optimal crispness, baking them immediately after assembly is recommended.
Leftover pear tartlets can be stored in an airtight container at room temperature for up to 2 days, or in the refrigerator for up to 3 days. To regain some of their original crispness, you can briefly reheat them in a toaster oven or conventional oven at 300°F (150°C) for about 5-7 minutes before serving.
It is generally best to use fresh pears for this recipe. Frozen pears tend to release a significant amount of water during thawing and baking, which can result in a soggy pastry and a mushier texture in the pears themselves. This can detract from the crispness and overall appeal of the tartlets.
You’ll need a baking sheet (lined with parchment paper or greased), a round cookie cutter (2.5-3 inches), a sharp knife or mandoline for slicing pears, a small bowl for cinnamon sugar, a pastry brush for butter, and a rolling pin (optional, for smoothing dough or re-rolling scraps). That’s it – no fancy equipment required!
🍽 What to Serve with Pear Tartlets
These individual pear tartlets are absolutely delightful on their own, offering a perfect balance of sweet, spicy, and buttery flavors. However, they can be easily elevated with a few simple accompaniments that enhance their warmth and comfort factor:
- Vanilla Ice Cream: A classic pairing! A generous scoop of creamy vanilla bean ice cream slowly melting over a warm tartlet creates an irresistible contrast of temperatures and textures. For those with dietary restrictions, a good quality dairy-free vanilla ice cream works wonderfully.
- Fresh Whipped Cream: A light, airy dollop of freshly whipped cream adds a delicate richness without being too heavy. You can sweeten it slightly with powdered sugar and a hint of vanilla extract.
- Coconut Cream: For a dairy-free alternative, whip up some chilled full-fat coconut cream until fluffy. It provides a tropical hint that complements the pears beautifully.
- Caramel Sauce: A drizzle of homemade or store-bought caramel sauce takes these tartlets to an even more decadent level, adding a sticky, sweet dimension that pairs perfectly with the spiced pears.
- Powdered Sugar: For a simple yet elegant finish, a light dusting of powdered sugar just before serving adds a touch of visual appeal and a whisper of extra sweetness.
- Aromatic Tea or Coffee: Pair these tartlets with a warm cup of chai tea, a fragrant Earl Grey, or a freshly brewed coffee for a cozy autumn treat.
Whether you keep it simple or go all out with toppings, these pear tartlets are sure to be a memorable and comforting end to any meal.
More Delicious Dessert Recipes to Explore
If you loved these pear tartlets, you might be eager to discover more easy and delicious dessert ideas. Here are some other delightful recipes that are perfect for satisfying your sweet cravings, especially during the autumn and winter months:
- Apple Pie Bars
- Air Fryer Apple Hand Pies
- Mini Brownie Bites with Eggnog Whipped Cream
- Mini Bundt Cakes with Citrus
Did you make this recipe? Don’t forget to leave a 5-Star 🌟🌟🌟🌟🌟 rating in the recipe card below, and if you really loved it, please leave a comment further down on the page. Your feedback is greatly appreciated!
Pear Tartlets
Marlynn Schotland
15 mins
15 mins
30 mins
15 tartlets
Print Recipe
Ingredients
- 4 Bartlett pears (firm and ripe)
- 1 portion of store-bought pie dough (refrigerate the second portion for later use)
- ¼ cup butter, melted (approx. 1/2 stick)
- Cinnamon Sugar (mix about 4 Tablespoons granulated sugar with 1/2 teaspoon ground cinnamon in a bowl)
Instructions
- Preheat your oven to 350°F (175°C). Prepare a baking sheet by lightly greasing it or lining with parchment paper.
- Carefully wash and slice the pears thinly, aiming for uniform slices about 1/8 to 1/4 inch thick. Set them aside.
- Allow the pre-made pie dough to defrost slightly at room temperature (about 10-15 minutes) as per package directions. Gently unroll it and smooth out any small tears or bumps using your fingers and a light roll with a rolling pin.
- Using a round cookie cutter (2.5 to 3 inches in diameter), cut circles out of the pie dough. Re-roll any scraps to cut additional circles.
- Place the dough circles onto your prepared baking pan, ensuring they are spaced about 1.5 to 2 inches apart.
- Melt the ¼ cup of butter. Using a pastry brush, spread a thin, even layer of melted butter over each dough circle.
- Evenly sprinkle a generous amount of the prepared cinnamon sugar mixture over each buttered dough circle.
- Arrange 3-5 thin slices of pears on top of each dough circle in an elegant fan formation, overlapping them slightly.
- Lightly sprinkle a bit more cinnamon sugar on top of the fanned pear slices for extra flavor and a beautiful caramelized finish.
- Bake in the preheated oven at 350°F (175°C) for approximately 15 minutes, or until the edges of each dough circle are a beautiful light golden brown and the pears appear tender.
- Remove the tartlets from the oven and let them cool at room temperature on the baking sheet for about 5 minutes before carefully transferring and serving. Enjoy warm!
Notes
Frozen pears: For the best results, it’s highly recommended to use fresh pears for this recipe. Frozen pears, when baked, tend to lose their structural integrity and release excessive moisture. This can result in a more mushy texture for both the pears themselves and a soggy, less desirable pastry crust.
Dough scraps: Don’t throw away dough scraps! Gently gather and press them together, then re-roll once or twice to cut out a few more tartlet circles. Avoid overworking the dough, which can make it tough.
Nutrition
Carbohydrates: 13g,
Protein: 1g,
Fat: 3g,
Saturated Fat: 1g,
Polyunsaturated Fat: 0.4g,
Monounsaturated Fat: 1g,
Cholesterol: 0.4mg,
Sodium: 51mg,
Potassium: 64mg,
Fiber: 2g,
Sugar: 5g,
Vitamin A: 20IU,
Vitamin C: 2mg,
Calcium: 11mg,
Iron: 0.4mg
Nutrition information is automatically calculated and should be used as an approximation.
Tried this recipe?
Please leave a star rating and comment! Then snap a pic of your dish and share it on social media. Tag @UrbanBlissLife and #UrbanBlissLife!