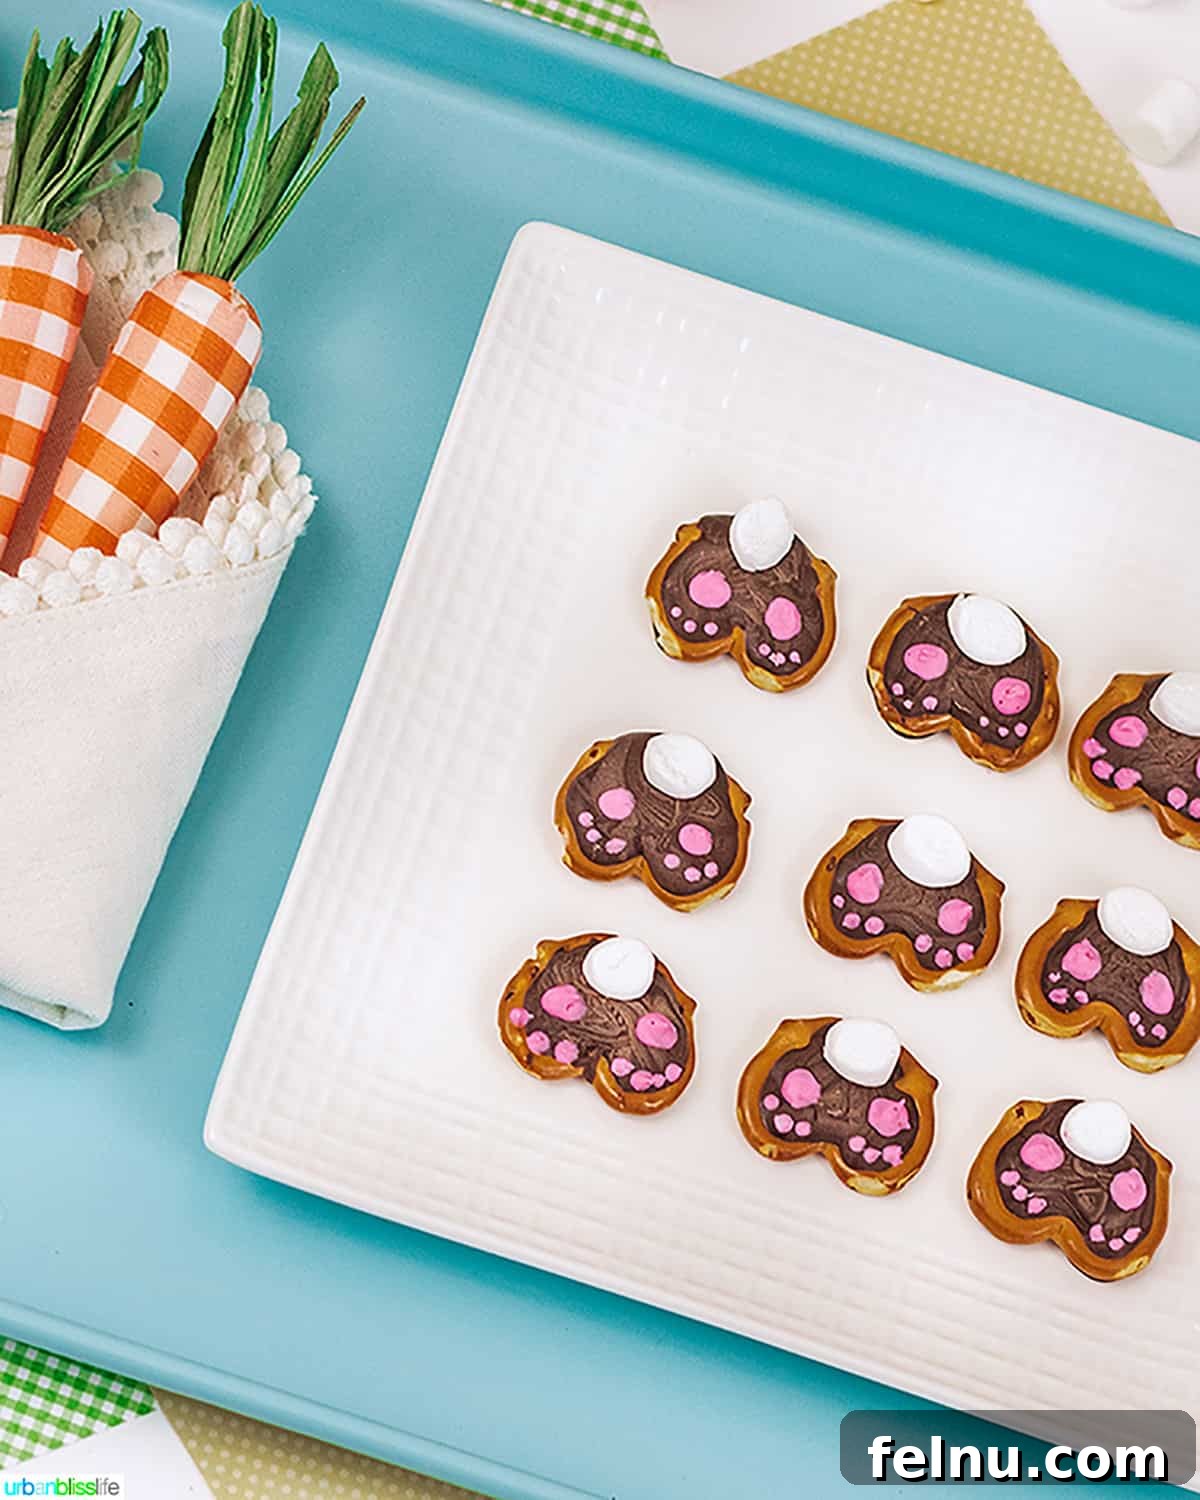
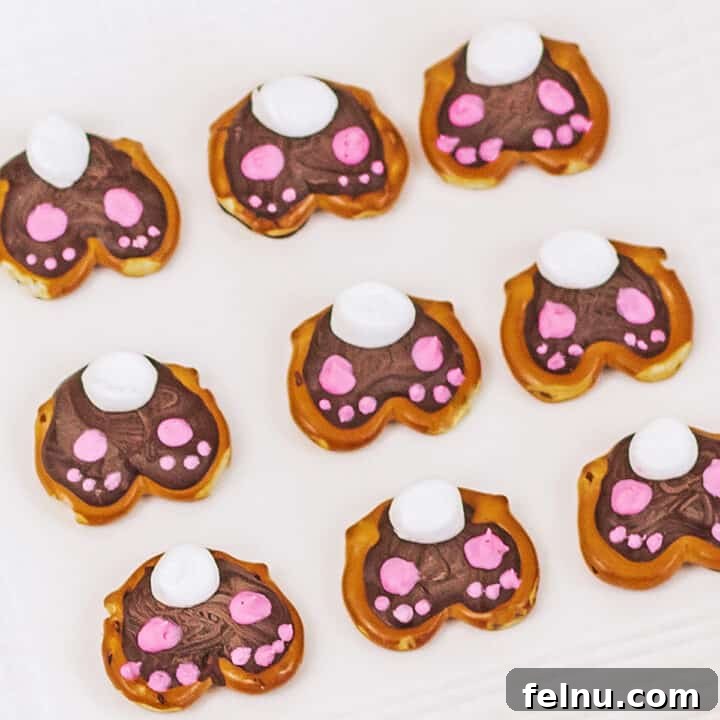
Looking for a delightfully fun, incredibly adorable, and wonderfully simple Easter treat that you can easily whip up with your little ones? Look no further! These charming Easter Bunny Pretzels are the perfect solution, combining a delightful crunch with sweet chocolate and a touch of whimsy. They’re not just a snack; they’re a memorable activity that brings smiles and creates cherished family moments.
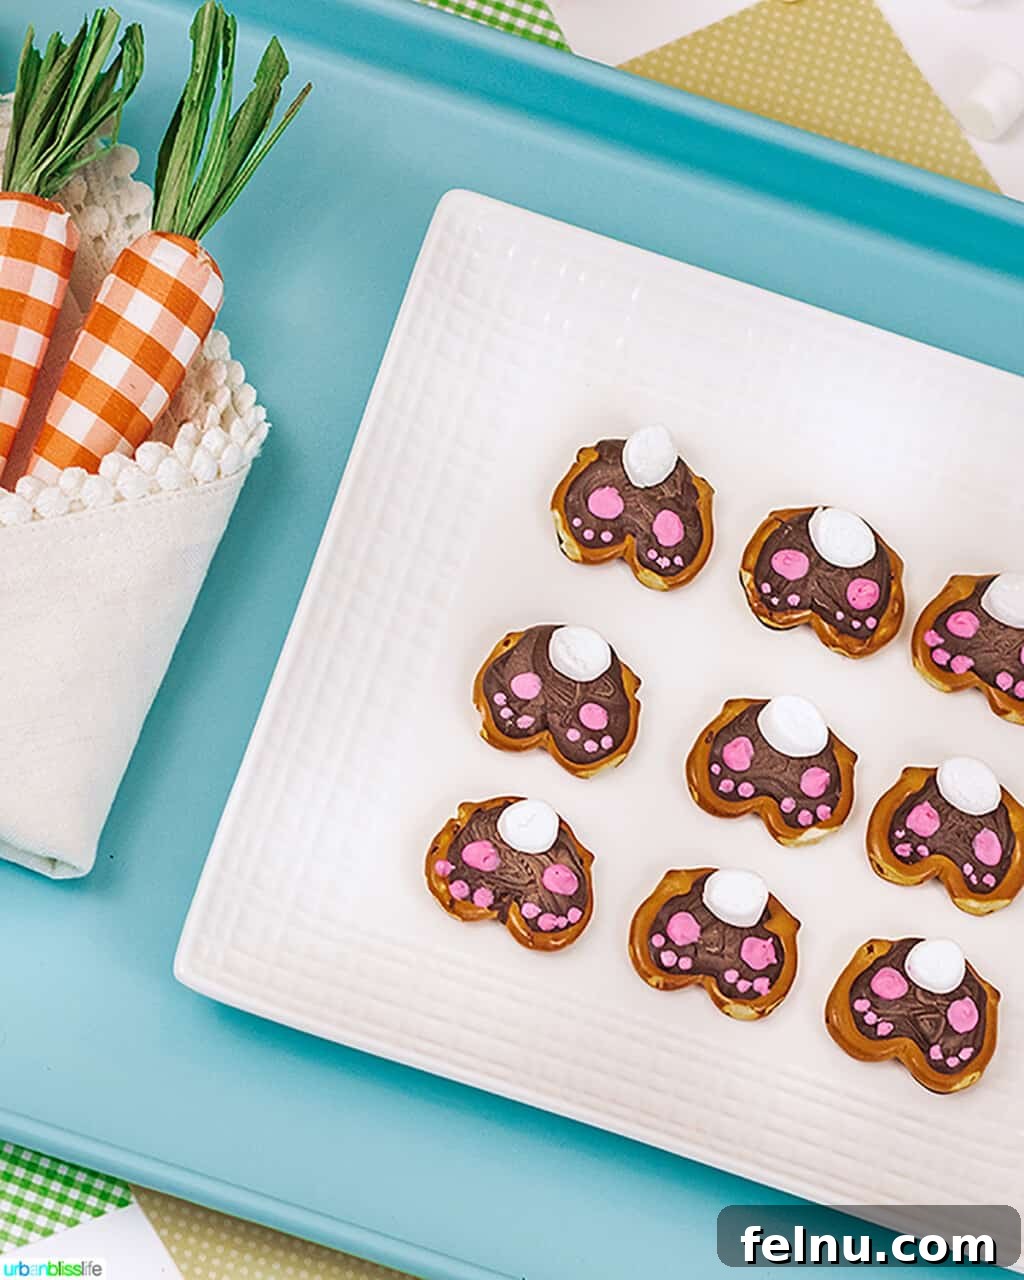
Easy & Adorable Easter Bunny Pretzels: A Fun Family Treat
As the vibrant colors of spring begin to emerge and the air fills with the promise of new beginnings, Easter celebrations are just around the corner. Whether you’re planning a festive Easter brunch, a casual get-together, or simply looking for a fun project to do with the kids, these Bunny Pretzels are an absolute must-try. They are incredibly simple to make, require minimal ingredients, and result in an undeniably cute treat that everyone, from toddlers to adults, will adore. Beyond Easter, these sweet and salty snacks are perfect for any spring-themed party or just a delightful afternoon activity.
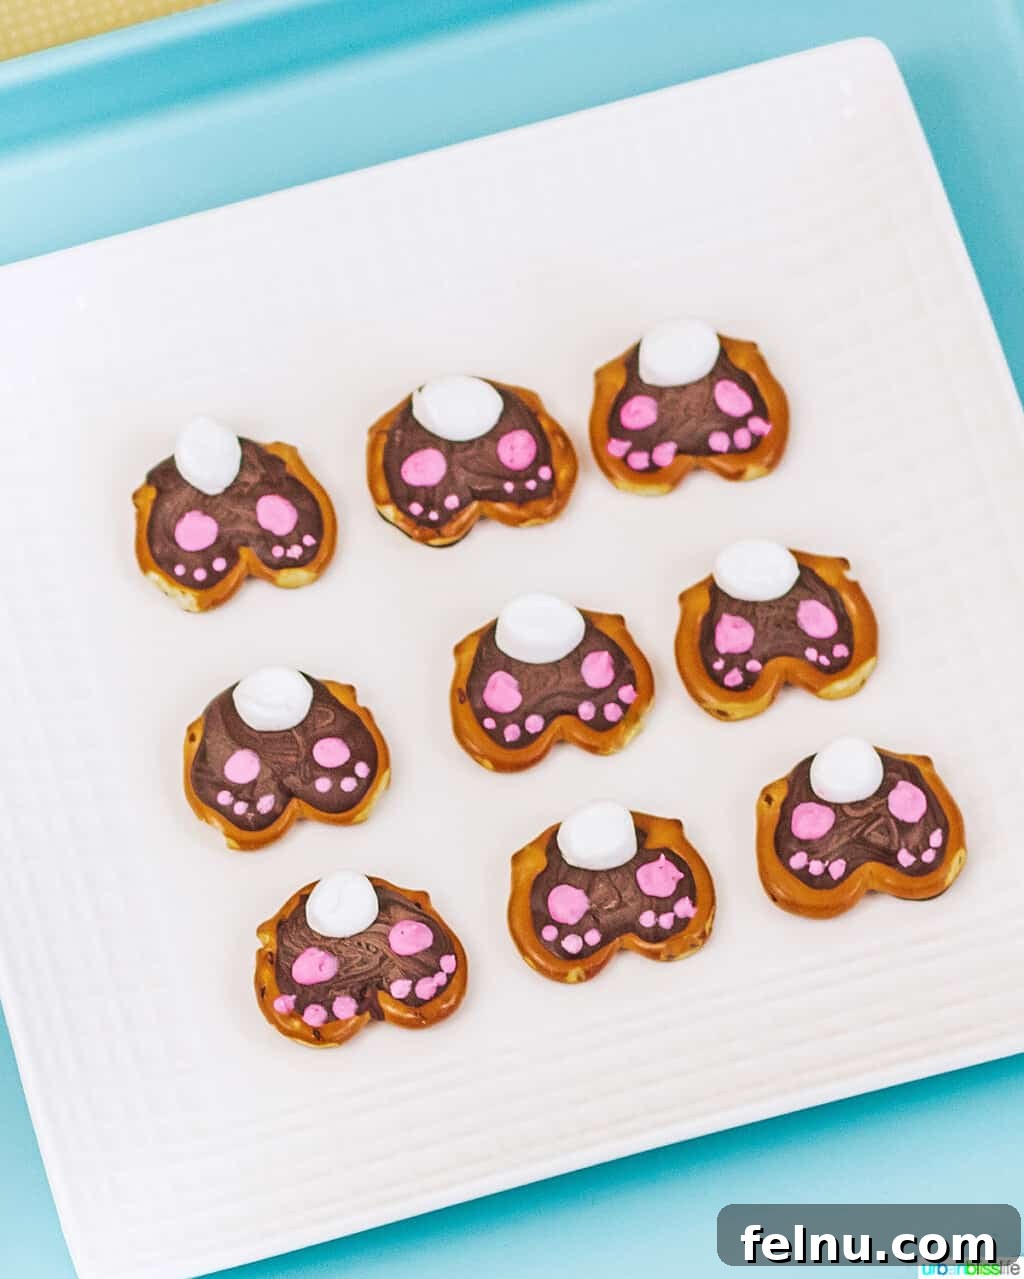
Imagine the smiles as your children transform ordinary pretzels and marshmallows into a whimsical parade of bunny bottoms. This recipe is designed to be foolproof, ensuring a successful and enjoyable baking experience for even the most novice decorators. The combination of salty pretzels, rich chocolate, and sweet, fluffy marshmallows creates a taste sensation that’s as delightful as their appearance. Let’s dive into how you can bring these adorable little bunnies to life in your own kitchen!
Gather Your Ingredients: What You’ll Need for Adorable Bunny Pretzels
Creating these delightful Easter Bunny Pretzels requires just a handful of common ingredients and basic kitchen tools. The beauty of this recipe lies in its simplicity, making it accessible for everyone. Here’s a detailed look at what you’ll need to get started:
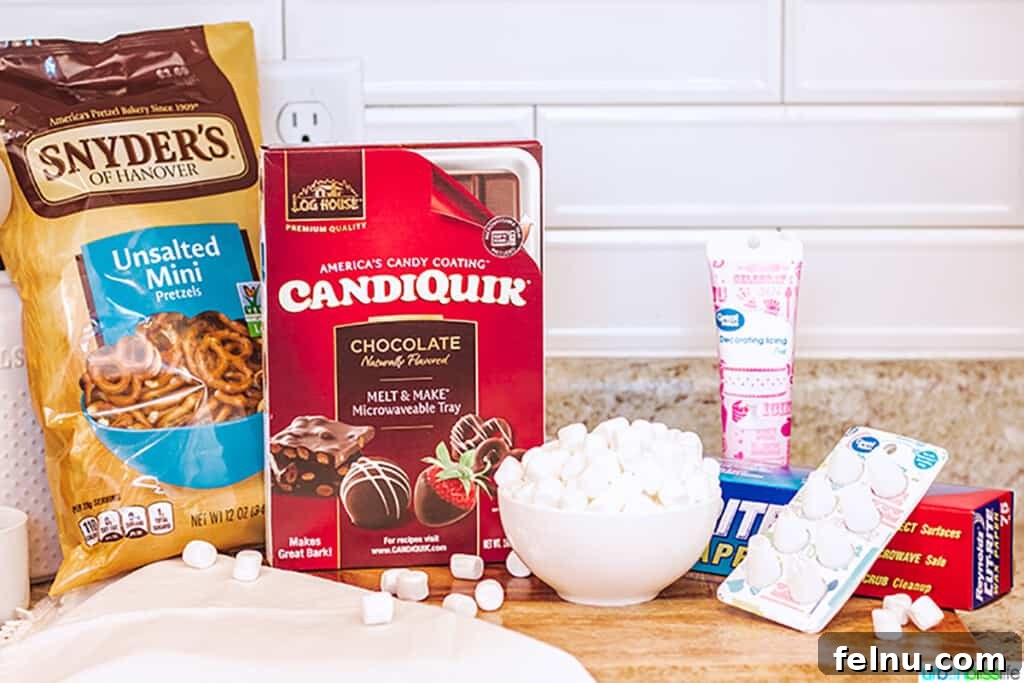
Essential Tools & Equipment:
- Wax Paper or Parchment Paper: This is crucial for easy cleanup and preventing your chocolate-coated pretzels from sticking to your work surface. Both wax paper and parchment paper work perfectly, creating a non-stick base for the setting chocolate.
- Baking Sheet: A flat baking sheet or tray provides a stable surface for arranging your pretzels and allowing the chocolate to set evenly.
- Microwave-Safe Bowl: You’ll need this for melting the chocolate coating. Choose a bowl that’s deep enough to stir comfortably.
- Small Spoon or Pastry Bag: A small spoon is ideal for carefully filling the pretzel holes with melted chocolate. Alternatively, if you prefer more precision, a disposable pastry bag with the tip snipped off can make the process even neater.
- Small Icing Tip (optional): If your pink icing tube doesn’t come with a fine-point tip, having one on hand will help you draw those delicate bunny paws with precision. A Wilton #3 round tip is usually a good choice.
Simple Ingredients for Sweet Success:
- Mini Pretzels: The foundation of our bunny butts! Mini pretzels are perfect for their size and classic shape, which forms the “body” of the bunny. You can use either salted or unsalted varieties; the choice is yours, depending on whether you prefer a more pronounced sweet-and-salty contrast. Standard-size pretzels can also be used if you prefer larger treats, simply adjust the amount of chocolate and marshmallow accordingly.
- Chocolate Candy Coating: This is key for a smooth, easy-to-work-with chocolate that sets quickly and beautifully. Brands like Candiquick or Wilton melting chocolates are designed specifically for dipping and coating, offering a glossy finish without tempering. You can also use chopped chocolate baking bars. **Important note:** While chocolate chips are convenient, they contain stabilizers that prevent them from melting as smoothly for coating purposes. They may result in a thicker, less appealing consistency. If chocolate candy coating isn’t available, high-quality baking chocolate is the next best option.
- Mini Marshmallows: These form the adorable, fluffy bunny tails! Classic white mini marshmallows are what we recommend for that authentic bunny look. However, if you’re feeling extra festive and can find springtime-themed pink or green mini marshmallows, feel free to use those for a colorful twist. You’ll be cutting these in half, so ensure they’re fresh and pliable.
- Pink Icing Tube: For drawing the tiny, cute bunny paws. Many brands offer pre-made icing tubes with various tips. If yours doesn’t include a fine-point tip, you’ll want to have one ready to achieve those delicate details. The consistency of tube icing is perfect for this task, as it dries quickly and holds its shape.
Step-by-Step Guide: How to Make Adorable Easter Bunny Pretzels
Get ready for some crafting fun! Making these bunny pretzels is an incredibly simple process, perfect for a delightful afternoon activity with children. Follow these easy steps to create your own batch of charming Easter treats.
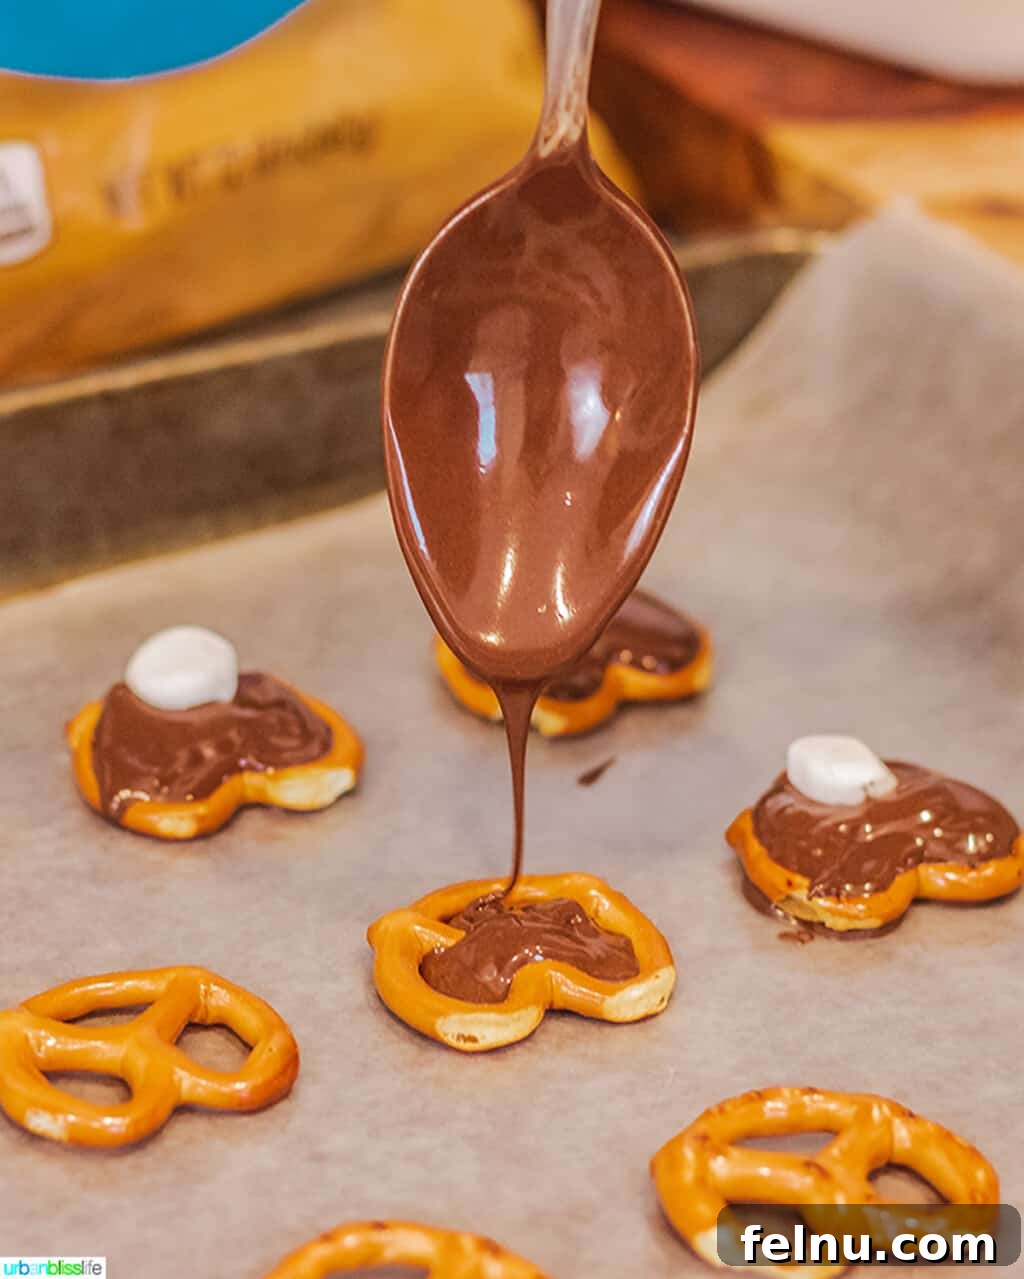
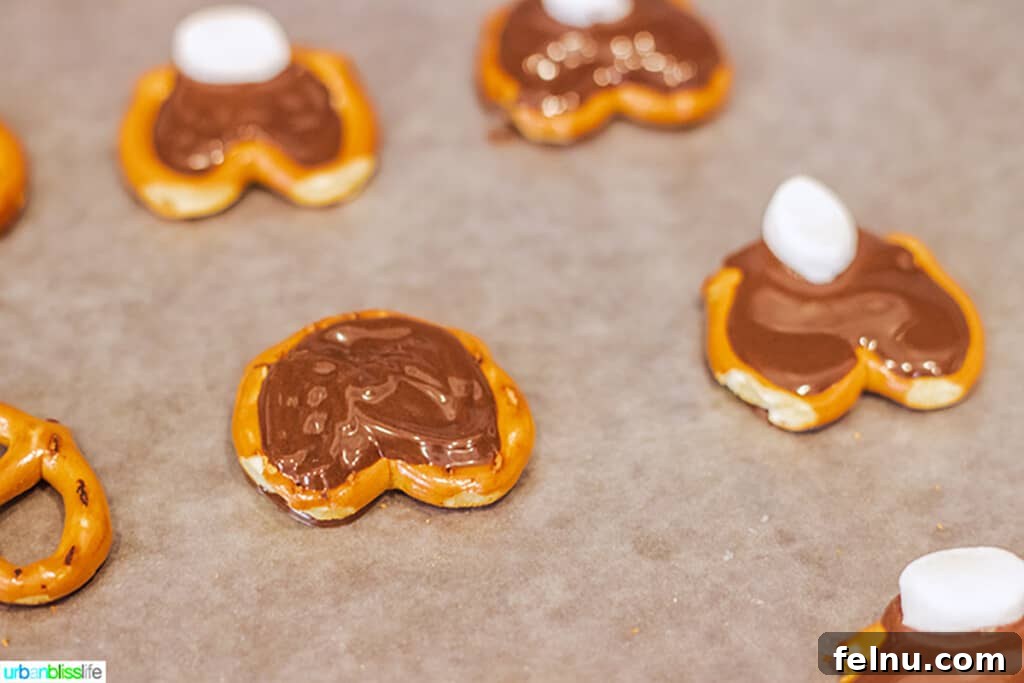
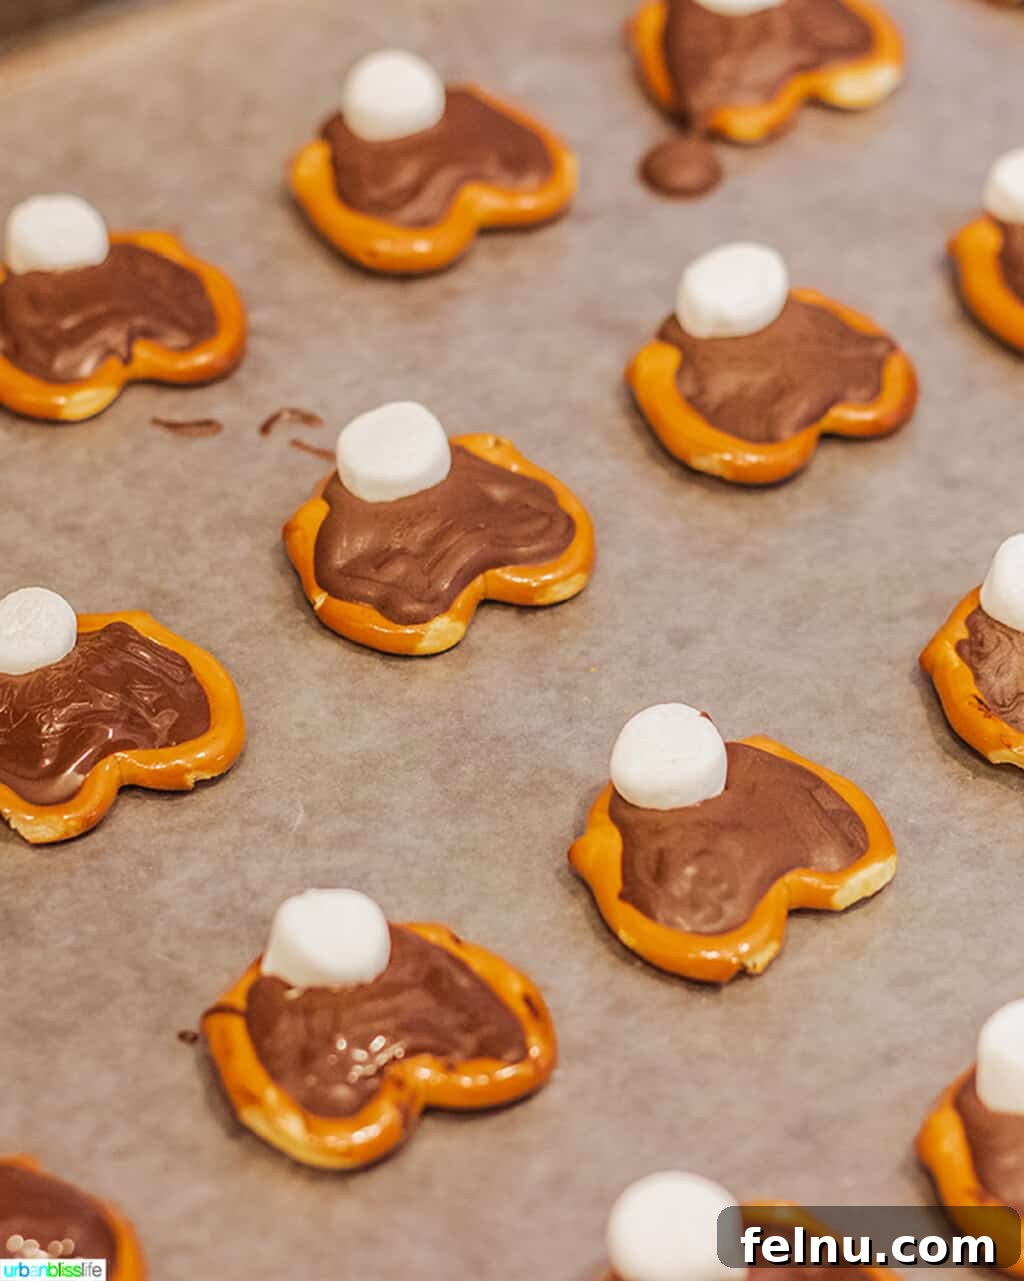
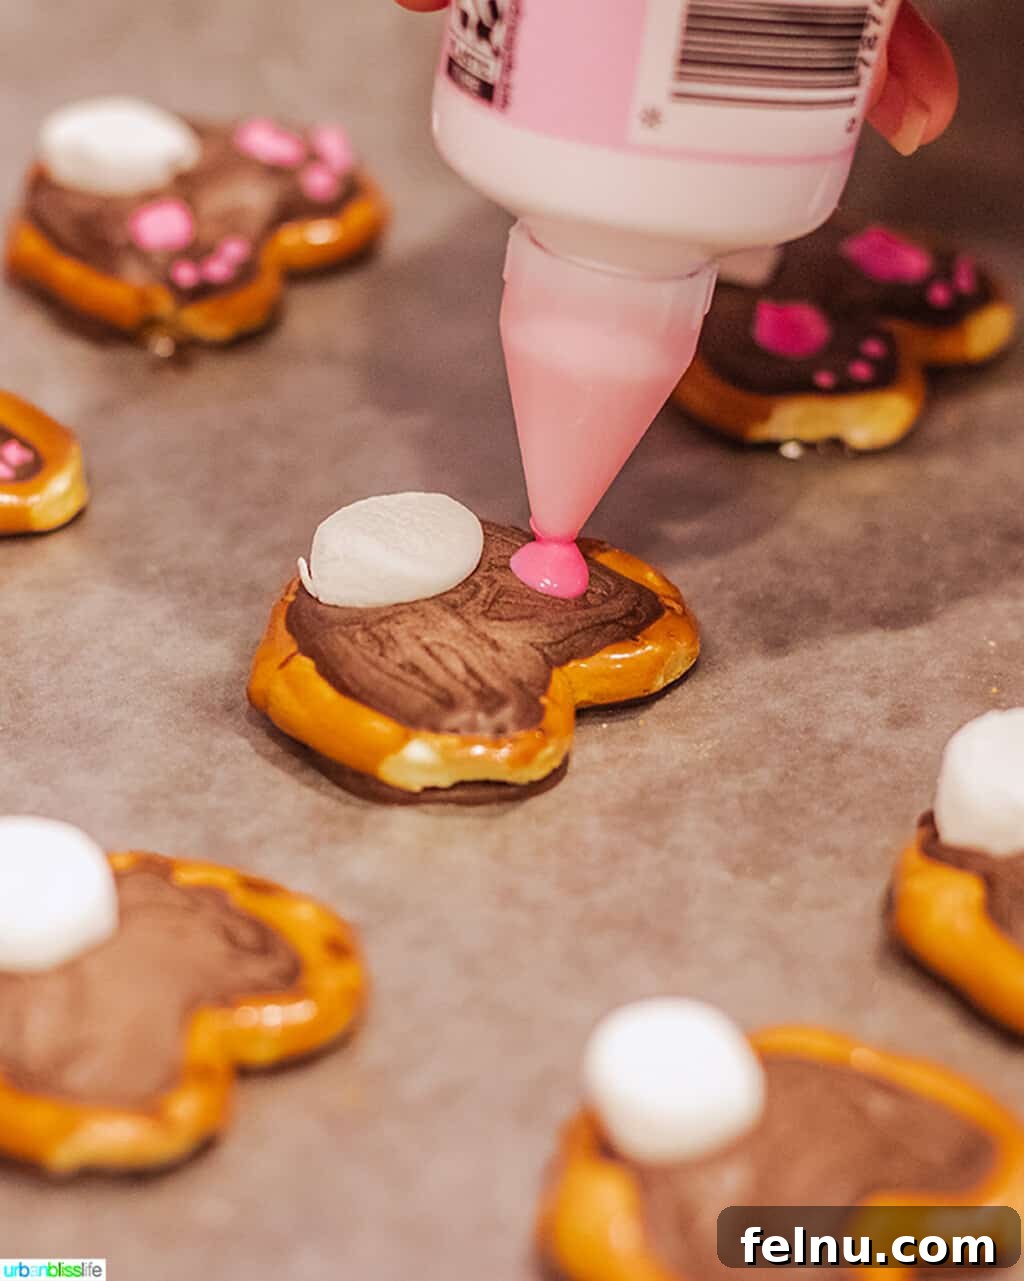
- Prepare Your Workspace: Start by laying a sheet of wax paper or parchment paper onto a clean baking sheet. This ensures your pretzels won’t stick and makes cleanup a breeze. Arrange your mini pretzels evenly spaced on the paper.
- Craft the Bunny Tails: Take your mini marshmallows and carefully cut each one in half crosswise. These halves will become the fluffy bunny tails. You’ll need one half-marshmallow for each pretzel bunny you plan to make. Using kitchen shears can make this step easier and less sticky than a knife.
- Melt the Chocolate: Place your chocolate candy coating in a microwave-safe bowl. Heat in the microwave according to the package directions, typically in 30-second intervals, stirring well after each interval until completely smooth and melted. Be careful not to overheat, as this can cause the chocolate to seize or burn. Remember, for best results, use actual candy coating or chopped baking chocolate, not chocolate chips.
- Fill the Pretzels: Using a small spoon, carefully fill the two larger holes of each pretzel with the melted chocolate. Aim to create a smooth, rounded surface that will serve as the “bunny body.” You can gently tap the baking sheet to help spread the chocolate evenly.
- Add the Marshmallow Tails: Immediately after filling each pretzel with chocolate, place one half of a marshmallow, cut side down, onto the chocolate-filled top hole of the pretzel. The melted chocolate will act as an adhesive, securing the marshmallow in place.
- Allow to Set: Let the chocolate and marshmallows set completely. You can leave them on the counter at room temperature for about 10-15 minutes, or place the baking sheet in the refrigerator for 5-10 minutes to speed up the process. The chocolate should be firm to the touch before moving to the next step.
- Pipe the Paws: Once the chocolate has fully set, it’s time to add the adorable bunny paws! Attach a small, fine-point tip to your pink icing tube (if it doesn’t have one). Carefully draw two small oval shapes or three small dots to create the “paws” on the chocolate, just below the marshmallow tail. A steady hand helps here!
- Final Drying: Allow the pink icing to dry and set for another 5-10 minutes. This prevents smudging when handling.
- Serve and Enjoy! Once everything is set, your charming Easter Bunny Pretzels are ready to be served and devoured!
Tips for Perfect Bunny Pretzels Every Time
Achieving picture-perfect and delicious Easter Bunny Pretzels is easy with a few simple tips:
- Chocolate Consistency is Key: Ensure your chocolate coating is perfectly smooth and fluid. If it’s too thick, it will be hard to work with. If it’s too thin, it might run off the pretzels. If it seems too thick, you can add a tiny bit of vegetable shortening (like Crisco) or coconut oil (1/2 teaspoon at a time) and stir until it reaches the right consistency.
- Work in Batches: Especially if you’re making a large quantity or working with kids, melting chocolate in smaller batches ensures it stays warm and pliable, preventing it from hardening before you can finish decorating.
- Kid-Friendly Tasks: Involve your children by letting them arrange the pretzels, place the marshmallow tails, or even help with the pink icing (with supervision for younger kids!). It’s a fantastic way to develop fine motor skills and creativity.
- Alternative Melting Methods: If you don’t have a microwave, you can melt the chocolate coating in a double boiler over simmering water. Just make sure no water gets into the chocolate, as this will cause it to seize.
- Creative Variations:
- White Chocolate Bunnies: Use white candy coating instead of brown for a different look. You could even tint it with food coloring for pastel bunnies!
- Sprinkle Fun: Before the chocolate sets, sprinkle a touch of pastel Easter sprinkles around the marshmallow tail for extra sparkle and festivity.
- Different Flavors: Experiment with flavored candy coatings like peanut butter or caramel for unique taste profiles.
- Decorative Icing: Instead of just paws, you could add tiny dots or stripes to the chocolate for added texture, using various colors of icing.
- Quick Chill for Setting: If you’re short on time, placing the baking sheet in the refrigerator for 5-10 minutes after adding the marshmallows will help the chocolate set much faster. Just don’t leave them in too long, as extreme temperature changes can sometimes cause chocolate to bloom (a white, powdery film).
Dairy-Free? Here Are More Resources and Recipes for You!
For those with dairy sensitivities or following a dairy-free lifestyle, you’ll be pleased to know that many chocolate candy coatings are naturally dairy-free. Always check the labels to ensure they meet your dietary needs. If you’re looking for more delicious dairy-free options, explore these fantastic recipes:
- My favorite dairy-free food products
- The BEST Dairy-Free Fettuccine Alfredo
- Creamy Dairy-Free Mac and Cheese
- Healthy Vegan Peanut Butter Cups
- Easy Dairy-Free Spinach Dip
- Thai Red Curry Noodles
- Dairy-Free Mixed Berry Ice Cream
How to Store Chocolate Bunny Pretzels
These delightful spring snacks are best enjoyed fresh, but they also store wonderfully, making them a great make-ahead option for parties or events. To keep them at their best, store your finished chocolate bunny pretzels in an airtight container at room temperature. They will remain fresh and delicious for up to five days. Avoid refrigerating them for extended periods, as this can sometimes cause the chocolate to “bloom” (develop a whitish film) or make the pretzels less crisp.
If you’re making them several days in advance, ensure they are stored in a cool, dry place away from direct sunlight and strong odors, which chocolate can easily absorb. Properly stored, these treats will be a hit whenever you decide to serve them!
More Delightful Easter Recipes
Easter is a time for feasting and creating beautiful food memories. If you’re looking for more inspiration to fill your holiday table, consider adding these other festive and flavorful dishes to your menu:
- Funfetti Cookie Bars
- Garlic Rosemary Glazed Carrots
- Ninja Foodi Hard Boiled Eggs (Instant Pot Method)
- Easy Spring Egg Appetizers
- Roasted Asparagus with Garlic and Lemon
- Spring Fruit Tarts
Easy Spring Bunny Pretzels Recipe
This recipe for spring bunny pretzels is so fun, adorable, and incredibly easy to make! It’s rated 5 stars by our community.
By: Marlynn Schotland
Prep Time: 15 minutes
Total Time: 15 minutes
Yields: Approximately 24 pieces
Share This Recipe:
- Pin on Pinterest
- Print Recipe
Summary: These spring bunny pretzels are so fun, adorable, and easy to make! A perfect treat for Easter or any spring occasion.
Equipment
- Wax paper or Parchment Paper
- Baking Sheet
- Microwave-Safe Bowl
- Small Spoon or Pastry Bag
- Small Icing Tip (optional)
Ingredients
- 12 Mini Pretzels (salted or unsalted)
- Chocolate Candy Coating (e.g., Candiquick, Wilton melts, or chopped baking chocolate)
- Mini Marshmallows (white, or pastel for a colorful variation)
- Pink Icing Tube (with a fine-point tip, if not included)
Instructions
- Place a sheet of wax paper or parchment paper on a baking sheet.
- Lay out your mini pretzels on top of the wax paper, ensuring they are evenly spaced.
- Cut each mini marshmallow in half crosswise. You’ll need one half-marshmallow for each pretzel bunny.
- Melt the chocolate candy coating in a microwave-safe bowl according to package directions (typically in 30-second intervals, stirring until smooth).
- Carefully use a small spoon to fill the two larger holes of the pretzels with the melted chocolate, creating a smooth surface.
- Immediately place a marshmallow half, cut side down, onto the chocolate-filled top hole of each pretzel to form the bunny’s tail.
- Allow the chocolate and marshmallows to set. This will take about 10-15 minutes at room temperature, or 5-10 minutes in the refrigerator.
- Once the chocolate has dried and is firm, use the pink icing tube (with a small point tip) to draw two small “paws” on the chocolate, just below the marshmallow tail, for the bunny’s feet.
- Let the pink icing dry and set completely.
- Serve and enjoy these adorable treats! Store any leftovers in an airtight container at room temperature.
Nutritional Information (Approximate)
Please note: Nutrition information is automatically calculated and should only be used as an approximation.
- Calories: 169 kcal
- Carbohydrates: 24g
- Protein: 3g
- Fat: 7g
- Saturated Fat: 4g
- Polyunsaturated Fat: 1g
- Monounsaturated Fat: 2g
- Trans Fat: 0.004g
- Cholesterol: 0.4mg
- Sodium: 241mg
- Potassium: 144mg
- Fiber: 2g
- Sugar: 6g
- Vitamin A: 6 IU
- Vitamin C: 0.4mg
- Calcium: 16mg
- Iron: 3mg
Tried this recipe? Please leave a star rating and comment! Then snap a pic of your dish and share it on social media. Tag @UrbanBlissLife and #UrbanBlissLife!
Pin This Recipe for Later!
Don’t forget to save this fantastic recipe for your Easter planning or whenever you need a quick, charming treat. Pin the image below to your favorite Pinterest board!