
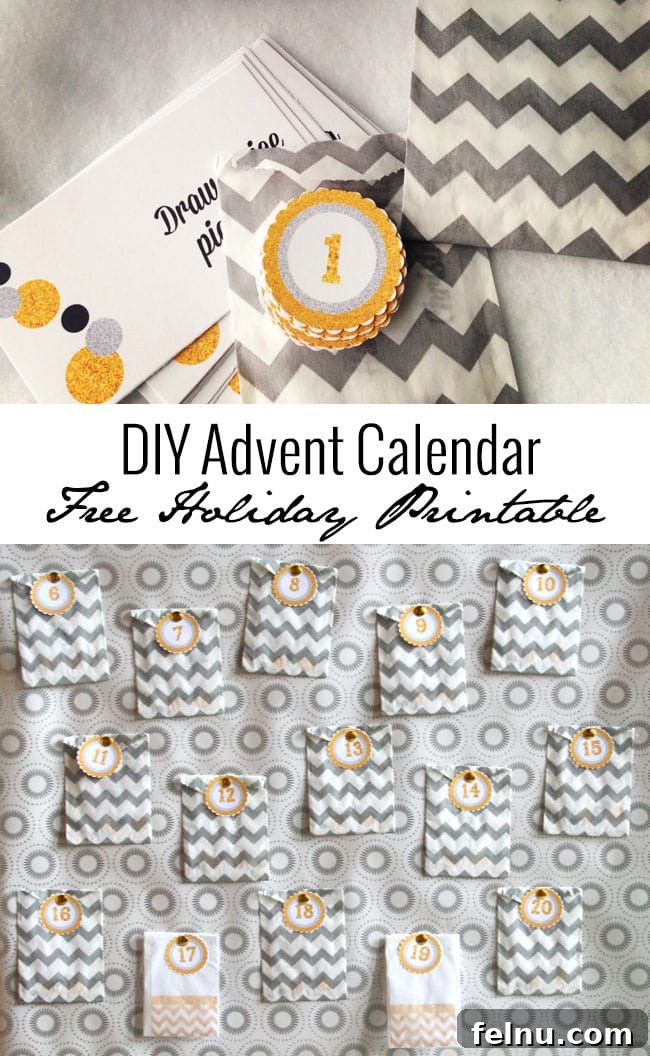
Craft Your Own Elegant DIY Advent Calendar: A Guide to Meaningful Holiday Traditions
The magic of the holiday season often lies in the cherished traditions we share with loved ones. For many, an Advent calendar is a cornerstone of this festive anticipation, a daily whisper of joy counting down to Christmas Day. While store-bought calendars offer convenience, there’s a unique charm and deep satisfaction in creating your own. Imagine a personalized Advent calendar, filled not with chocolates or trinkets, but with meaningful activities designed to bring your family closer and truly embody the spirit of giving and togetherness.
Growing up, an Advent calendar might have been a distant memory, or perhaps a beloved annual ritual. My own children discovered the delight of this tradition through thoughtful gifts from their grandmother – simple card calendars that sparked daily excitement and discovery. Witnessing their pure joy, I was inspired a few years ago to embark on a journey of crafting our very own DIY Advent calendars, transforming a simple countdown into a heartwarming family project.
This year, embracing a timeless aesthetic of silver, gold, and white, we’re proudly re-using the elegant Advent calendar I crafted previously. This decision not only highlights the sustainability and reusability of a well-made DIY project but also underscores the enduring beauty of classic holiday decor. Join me as I guide you through the simple, yet profoundly rewarding, process of making a beautiful and meaningful activity-based Advent calendar that your family will adore for years to come.
What is an Advent Calendar & Why Choose DIY?
Before diving into the craft, let’s briefly touch upon the essence of an Advent calendar. Rooted in German Lutheran tradition, an Advent calendar marks the days of Advent in anticipation of Christmas. Traditionally, it began on December 1st and culminated on Christmas Eve or Christmas Day. Today, these calendars have evolved into a beloved worldwide tradition, offering a daily reveal that builds excitement for the holidays.
While a plethora of options exist – from classic chocolate calendars to those filled with small toys or beauty products – choosing a DIY activity-based Advent calendar offers unparalleled benefits:
- Personalization: You tailor every activity to your family’s unique interests, values, and traditions. No more generic suggestions; these are experiences crafted just for you.
- Meaningful Engagement: Instead of focusing on material goods, an activity calendar shifts the focus to shared moments, acts of kindness, and fostering the true spirit of the season. It encourages family bonding and creating lasting memories.
- Sustainability and Reusability: By choosing durable materials and a timeless design, your DIY Advent calendar can become a cherished heirloom, brought out year after year, reducing waste and strengthening family traditions.
- Budget-Friendly: Often, crafting your own calendar is more economical than purchasing a high-quality, pre-filled one, especially when you can utilize materials you already have.
- The Joy of Creation: The process of making the calendar itself can be a delightful pre-holiday activity, allowing for creative expression and a sense of accomplishment.
Designing Your Elegant & Reusable Advent Calendar
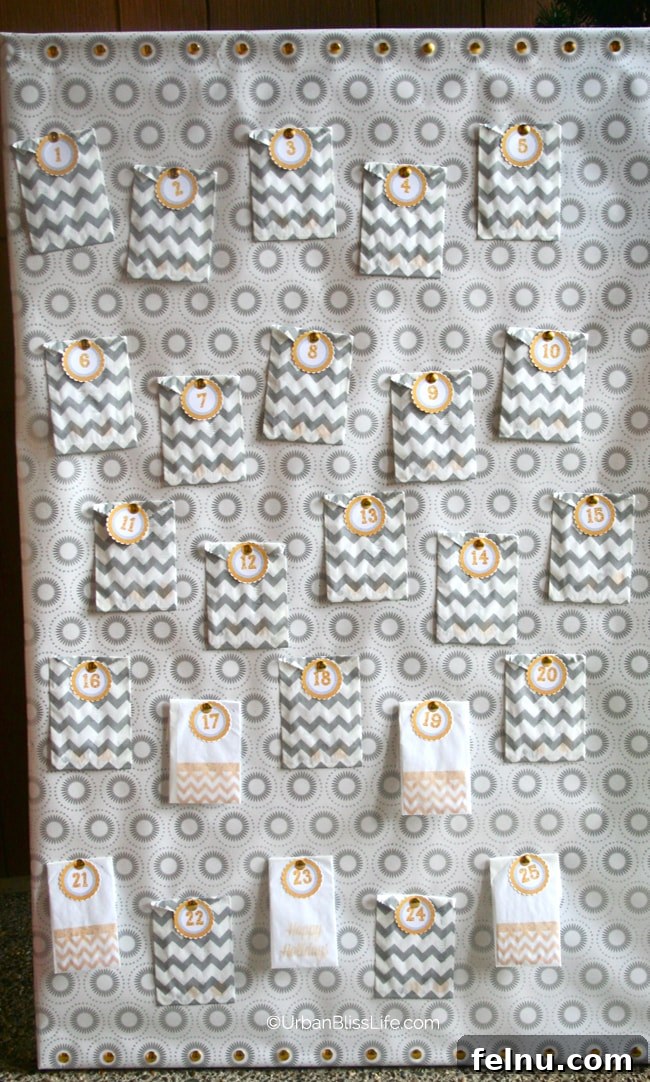
The foundation of this project is its elegant design, specifically the silver, gold, and white color scheme. This palette isn’t just visually appealing; it’s chosen for its versatility and timelessness, ensuring the calendar complements almost any holiday decor, allowing for seamless reuse year after year. Whether your home is modern, rustic, or traditional, these metallic and neutral tones blend beautifully, offering a sophisticated touch to your festive arrangements.
Beyond aesthetics, the true heart of this Advent calendar lies in its activity cards. Unlike calendars that dispense small treats or toys, this version offers a daily prompt for family interaction, kindness, and festive cheer. The printable PDF file I’ve designed includes beautifully numbered cards for each day of Advent, along with a variety of activity cards tailored to foster the season’s spirit. These activities range from simple joys to acts of giving:
- “Write a nice note to your teacher or a service person.”
- “Sing Christmas songs together as a family.”
- “Bake and decorate Christmas cookies for neighbors.”
- “Read a favorite Christmas story before bed.”
- “Make handmade ornaments for the tree.”
- “Watch a classic holiday movie with popcorn.”
- “Donate canned goods to a local food bank.”
- “Call a faraway relative to wish them happy holidays.”
- “Plan a family game night.”
Each activity is crafted to be inclusive and engaging for families, promoting togetherness and mindfulness during a busy time of year. To ensure maximum flexibility, I’ve also included several blank activity cards. This allows you to personalize the calendar even further, adding unique family traditions, inside jokes, or specific local events that are special to you. The beauty of this DIY approach is that your calendar truly reflects your family’s journey through the holidays, making each day’s discovery even more special.
Materials You’ll Need
Crafting this elegant DIY Advent calendar is wonderfully straightforward and quick, often utilizing materials you might already have on hand. The key is selecting items that not only fit your desired aesthetic but also offer durability for years of joyous use. Here’s a detailed list of what you’ll need:
- Large Canvas or Corkboard: An ideal base size is at least 18 x 24 inches, providing ample space for all 24 days. A canvas offers a clean, taut surface that’s easy to wrap, while a corkboard provides a slightly softer base, perfect for easily pushing in thumbtacks. Choose a sturdy option that will hold up over time. You can find these at any craft store or even repurpose an old piece.
- Wrapping Paper or Fabric: This will serve as the decorative background for your calendar. For our chosen silver, gold, and white theme, look for elegant metallic wrapping paper, perhaps with subtle patterns like snowflakes, stars, or simple geometrics. Alternatively, a beautiful piece of fabric – a shimmering silver brocade, a white linen with gold threads, or even a simple, textured white fabric – can add a luxurious touch and enhanced durability, making your calendar truly reusable. Ensure you have enough to comfortably wrap around your chosen base.
- Gold or Silver Thumbtacks: These are not just functional for securing your envelopes; they also serve as a beautiful decorative element. Choosing metallic thumbtacks that match or complement your color scheme (gold for a warm glow, silver for a cool shimmer) elevates the overall design. Decorative push pins with ornate heads can also be a wonderful choice.
- Mini 3″ x 5″ Silver or Gold Envelopes or Favor Bags: These small containers will hold your daily activity cards. Look for mini envelopes or favor bags in coordinating metallic shades. Chevron patterns, polka dots, or plain solid metallics work wonderfully. The 3″ x 5″ size is perfect for neatly tucking in the activity cards without being too bulky. You can often find these in party supply stores, craft stores, or online retailers.
- Download & Print the DIY Advent Calendar Printable PDF: This essential resource includes all 24 numbered circles and a collection of activity cards, plus blank cards for your custom ideas. Printing these on sturdy cardstock will ensure they last longer, especially if you plan to reuse them annually.
Step-by-Step Instructions to Create Your Masterpiece
Follow these simple steps to bring your elegant, activity-based Advent calendar to life. The process is designed to be enjoyable and straightforward, even for novice crafters.
Step 1: Prepare Your Base with a Festive Covering
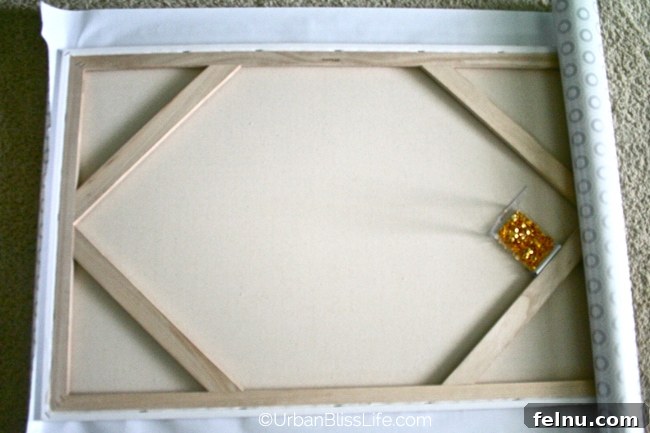
Lay your chosen wrapping paper or fabric face down on a clean, flat surface. Center your large canvas or corkboard on top of it. Carefully wrap the paper or fabric around the edges of the canvas/corkboard, just as you would wrap a gift. Ensure the paper or fabric is pulled taut across the front surface to create a smooth, wrinkle-free finish. Neatly fold the corners for a professional look, much like wrapping a present.
Step 2: Secure the Covering for Lasting Beauty
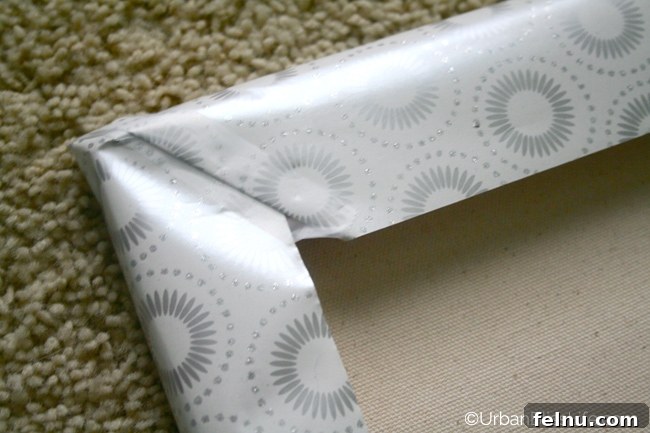
Once your covering is perfectly positioned, secure it to the back of the canvas or corkboard. If using wrapping paper, strong double-sided tape or hot glue works best for a clean finish. For fabric, staples (using a staple gun) or small tacks will provide a more robust and lasting hold, ensuring the fabric remains taut and doesn’t fray over time. Trim any excess paper or fabric from the back for a tidy appearance.
Step 3: Add Decorative Thumbtacks
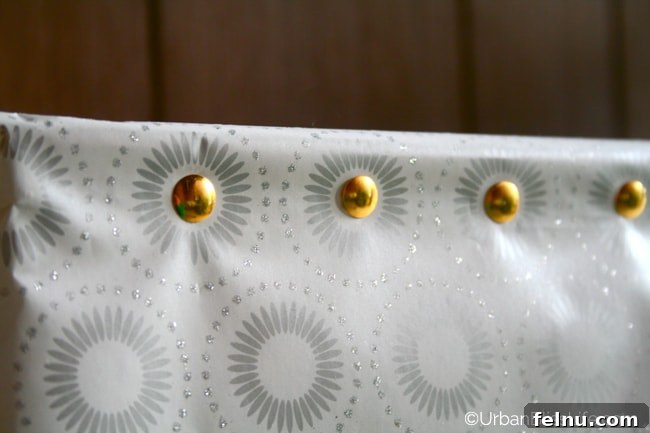
This step allows for creative expression. If your wrapping paper or fabric has a repeating pattern (like circles, snowflakes, or hearts), you can strategically place your gold or silver thumbtacks within these patterns. This creates a cohesive and integrated design where the thumbtacks appear to be part of the background. Alternatively, if your background is plain, you can create your own pattern – a neat grid, a random scattering, or even outlining a shape like a Christmas tree – using the thumbtacks. These will serve as anchor points for your envelopes.
Step 4: Prepare Your Advent Numbers and Activity Cards
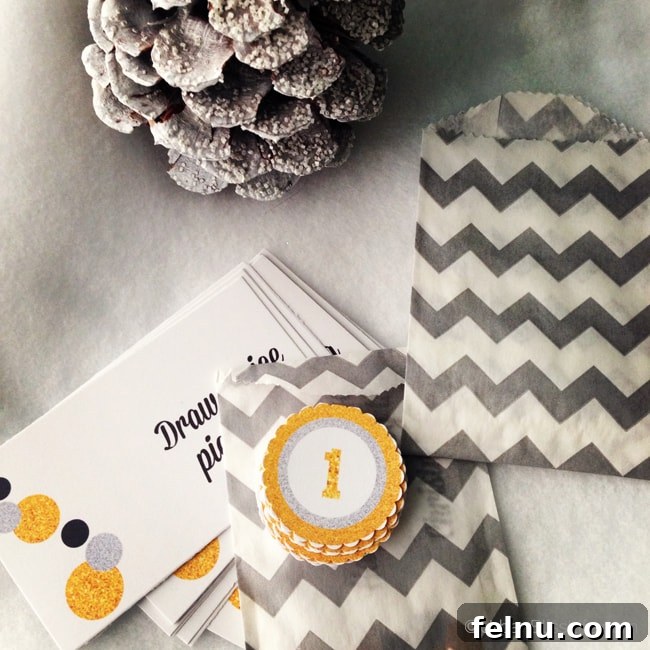
Download and print the free Advent calendar printable PDF. Use sturdy cardstock for durability. Carefully cut out each numbered circle and all the activity cards. To add an extra touch of flair, consider using a decorative hole punch – a scallop punch offers a charming edge, but a standard round hole punch or even just scissors will work perfectly well. For extended reusability, you might also consider laminating the numbers and activity cards.
Step 5: Fill Your Mini Envelopes with Daily Activities
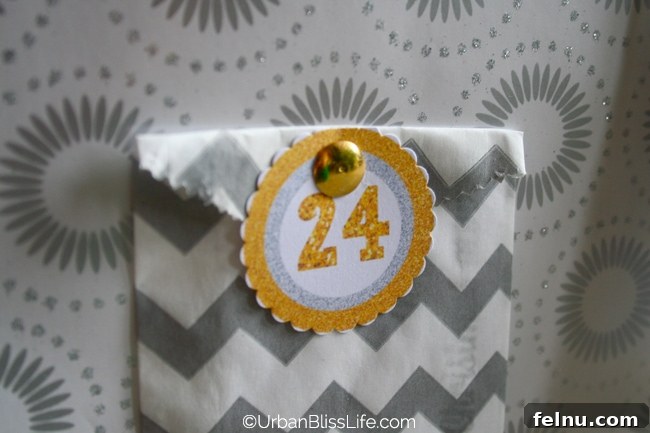
Now for the fun part! Place one activity card into each small envelope or treat bag. Aim to mix up the types of activities so there’s a good variety throughout the month – some days a simple song, others a family outing. Ensure your envelopes or bags are in coordinating colors (silver, gold, white, or metallic accents) to match your overall theme. The mini chevron silver treat bags used in the example are a great choice for a modern, festive look. Remember to add your custom activities to the blank cards you prepared.
Step 6: Assemble Your Advent Calendar with Daily Surprises
With your envelopes filled and numbers ready, it’s time to arrange them on your wrapped canvas or corkboard. Decide on a pattern – a traditional grid, a whimsical random scattering, or even a creative shape like a Christmas tree. Tack each envelope or treat bag to the board using your gold or silver thumbtacks, making sure one numbered circle is clearly visible on the front of each. You can either attach the number to the envelope or directly to the board next to it. Ensure the order is numerical, allowing for the daily countdown to unfold seamlessly.
Step 7: Display Your Beautifully Crafted Advent Calendar
Your stunning DIY Advent calendar is now complete! If your canvas or corkboard is large and sturdy enough, like mine, you can simply lean it elegantly against a wall on a console table, mantelpiece, or bookshelf. Alternatively, if you prefer, you can mount it securely to a wall using appropriate picture hangers. Choose a prominent spot in your home where your family can easily gather each day to reveal the next exciting activity, making it a focal point of your holiday decor and anticipation.
Customization and Creative Ideas
The beauty of a DIY project is the endless possibilities for personalization. While we’ve focused on an elegant silver, gold, and white theme with activity cards, don’t hesitate to infuse your calendar with elements that truly reflect your family’s unique personality and preferences.
- Activity Expansion: Beyond the provided printable, brainstorm more activity ideas! Consider age-appropriate tasks for younger children (e.g., “Decorate gingerbread men,” “Write letters to Santa”) and more involved ones for teens or adults (e.g., “Volunteer at a soup kitchen,” “Host a cozy movie night with holiday treats”). Tailor them to local events or specific family traditions.
- Alternative Fillers: While activities are incredibly meaningful, if you prefer a different kind of daily surprise, consider small, inexpensive items that fit your theme. These could be miniature holiday erasers, small decorative pins, tiny puzzles, or even slips of paper with thoughtful quotes or daily affirmations. The key is to keep them small enough to fit in your envelopes or bags.
- Themed Variations: Don’t feel limited to metallics! Your calendar could embrace a rustic farmhouse theme with burlap and twine, a whimsical gingerbread theme with cheerful reds and greens, or a serene winter wonderland theme with blues and silvers. Choose a theme that brings joy to your heart and complements your home.
- Envelope Alternatives: Instead of mini envelopes, you could use small fabric pouches, tiny gift boxes, or even paper cups stapled to the board. Get creative with what you use to hold your daily surprises, ensuring they are sturdy and aesthetically pleasing.
- Durability Boost: For longevity, especially if you plan to reuse the calendar annually, consider applying a clear sealant or a layer of Mod Podge over your wrapped canvas/corkboard. This protects the paper or fabric from wear and tear, making it even more robust for future holiday seasons.
By thinking outside the box and adding these personal touches, your DIY Advent calendar will not only serve its purpose but also become a cherished piece of family history, rich with memories and bespoke charm.
Download Your Free Advent Calendar Printables
Ready to start creating your own meaningful holiday countdown? Download your free Advent Calendar numbers and activity cards here. This printable PDF is your essential companion for crafting a calendar filled with joy, kindness, and family togetherness.
Creating a DIY Advent calendar is more than just a craft project; it’s an opportunity to intentionally weave meaningful moments into the fabric of your holiday season. It encourages reflection, gratitude, and shared experiences, transforming the countdown to Christmas into a daily celebration of family love and festive cheer. Does your family traditionally have an Advent calendar? What other beloved family traditions do you embrace as you lead up to the holidays? Share your stories and inspire others to create their own magic this festive season!