
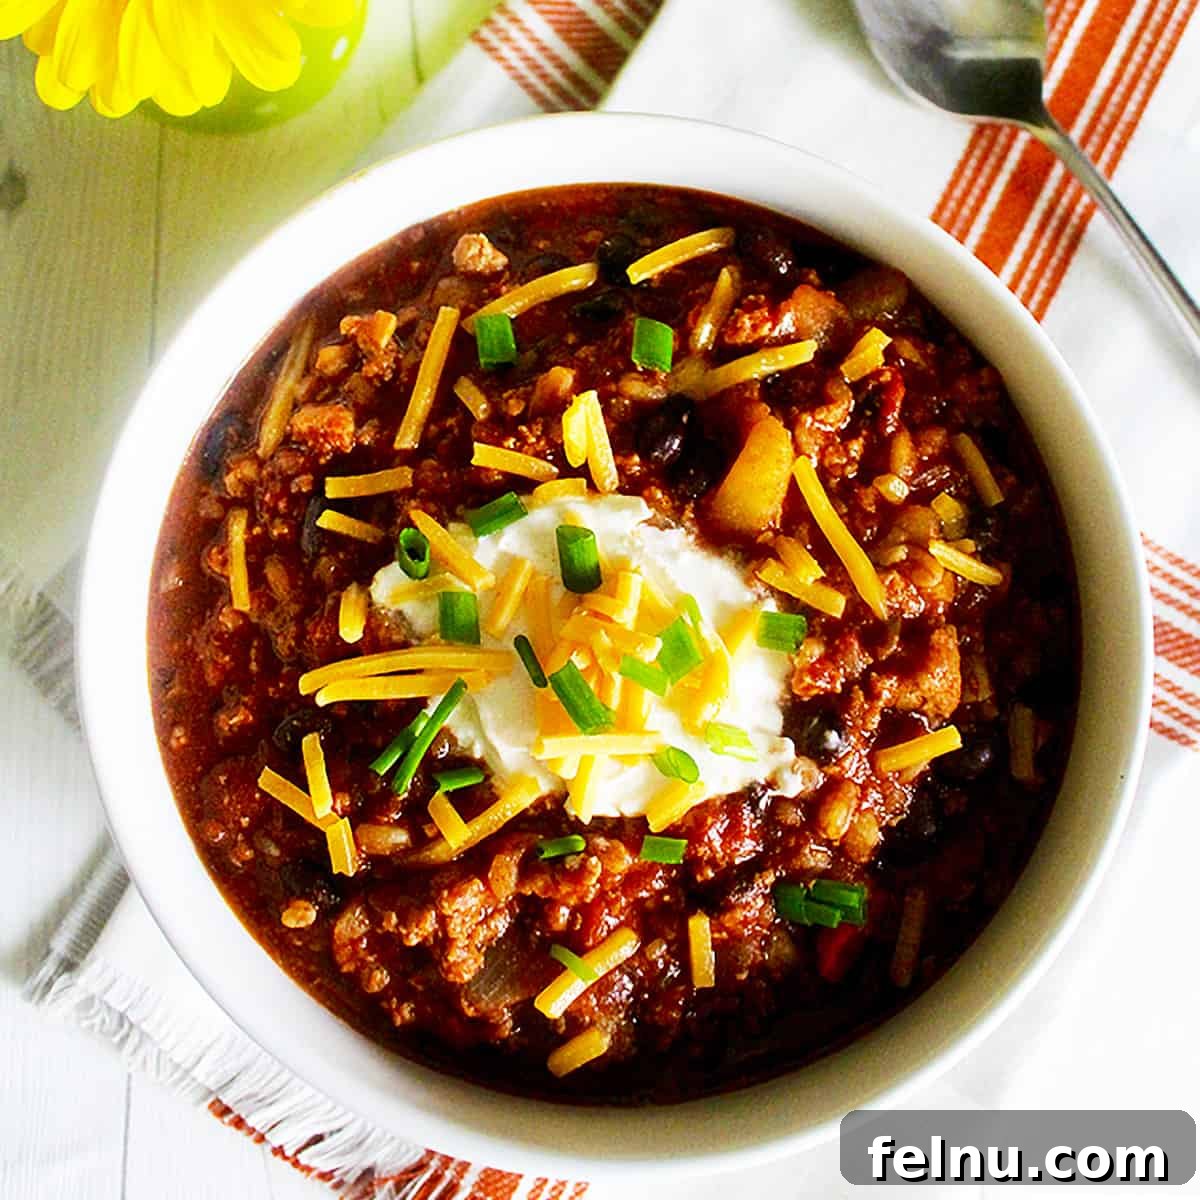
This ultimate hearty Dutch oven chili is the epitome of comfort food! Crafted with a deep, rich coffee chocolate stout, lean ground turkey, and wholesome farro, this chili is also brimming with fresh vegetables. It’s a satisfying meal that warms you from the inside out, making it a perfect centerpiece for family dinners or cozy gatherings.
This recipe was originally published on February 19, 2016, and has been thoughtfully updated on December 21, 2022. The update includes brand new photos, more in-depth helpful content, and a refined recipe that is truly better than ever!
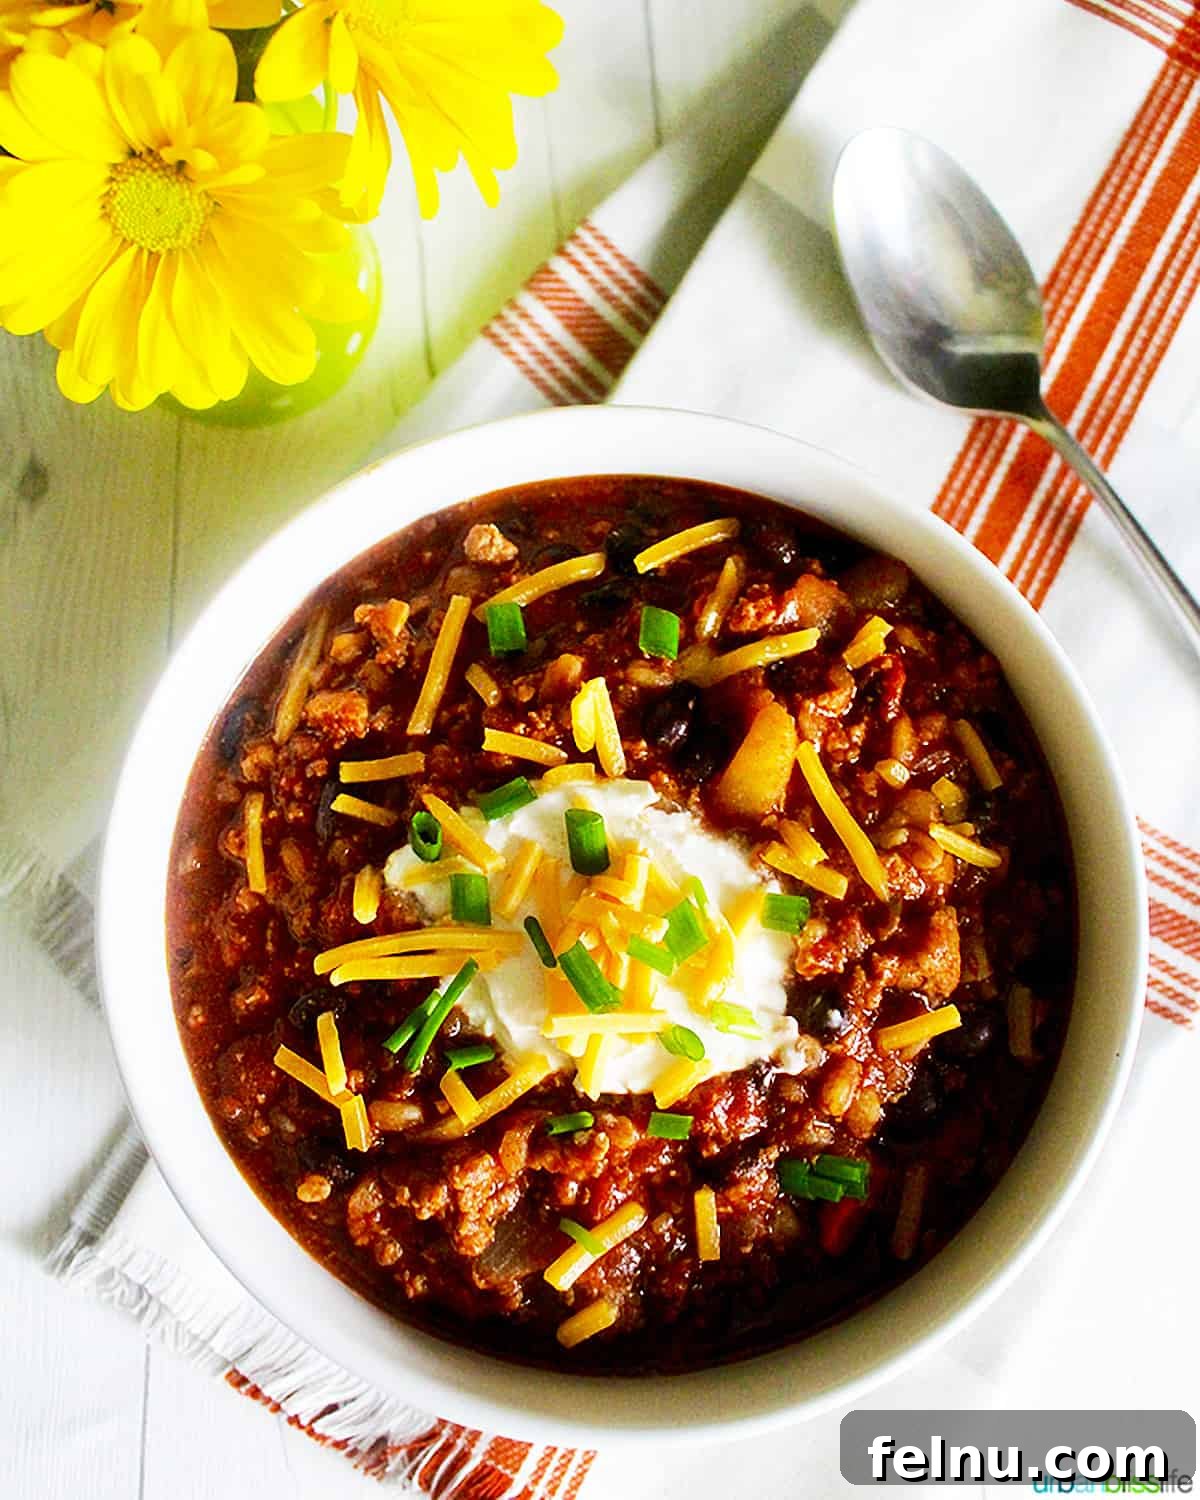
As the cooler seasons arrive, there’s nothing quite like the comforting embrace of a warm, delicious bowl of chili. It’s a dish that transcends mere sustenance, offering a sense of coziness and well-being. This particular Dutch Oven Turkey Chili is designed to deliver maximum flavor and satisfaction, making it an ideal choice for family dinners, game nights, or simply a quiet evening at home.
While my Instant Pot Turkey Chili offers a fantastic, quick solution for a classic three-bean and ground turkey chili, this Dutch oven version provides a distinctly different experience. It’s for those times when you crave a chili with a richer, more profound depth of flavor, meticulously developed through a slower cooking process. Infused with stout beer and the unique texture of farro, this recipe promises a truly unique and soul-soothing meal, especially perfect for those blustery winter days and nights.
Table of Contents
- Why This Dutch Oven Chili is a Must-Try
- The Magic of Dutch Oven Cooking for Chili
- Key Ingredients and Smart Substitutions
- Step-by-Step Guide to Your Best Chili Yet
- Pro Tips for Dutch Oven Chili Perfection
- Serving Suggestions and Topping Ideas
- Storage and Meal Prep Made Easy
- Frequently Asked Questions About Dutch Oven Chili
- Essential Kitchen Tools
- More Comforting Recipes to Explore
- Recipe Card: Dutch Oven Turkey Chili with Stout and Farro
🌟 Why This Dutch Oven Chili is a Must-Try

This hearty turkey chili isn’t just a meal; it’s an experience, hitting all the right notes on a chilly day. Here’s why this recipe stands out and deserves a spot in your culinary repertoire:
- Effortless Preparation: Despite its rich flavors and wholesome ingredients, this is an incredibly easy recipe to follow, making it accessible for cooks of all skill levels, from beginners to seasoned home chefs.
- Wholesome, Accessible Ingredients: You’ll find most of the ingredients readily available at your local grocery store. We prioritize fresh produce and pantry staples, and for those unique situations, we offer clever substitution options to cater to your pantry and dietary preferences.
- A Healthier Twist with Uncompromised Flavor: By opting for lean ground turkey instead of traditional beef, this chili becomes a lighter, healthier alternative. It’s lower in saturated fat but still delivers the robust, satisfying flavors you expect from a truly great chili, proving healthy can be delicious.
- Unrivaled Depth of Flavor from Stout: The inclusion of a dark stout beer (especially a coffee or chocolate variety) is a culinary secret weapon. It imparts a profound richness, a subtle sweetness, and a complex malty undertone that profoundly elevate the chili’s profile, creating an exceptionally rich and nuanced taste that lingers wonderfully.
- Texture Perfection with Farro: The ancient grain farro adds a delightful, satisfying chewiness and hearty texture that elevates the chili beyond typical bean-only versions. Its unique bite complements the tender turkey and soft vegetables, providing a more complex and enjoyable mouthfeel.
- A Customizable Culinary Canvas: This chili serves as the perfect base for an array of your favorite toppings. It’s a versatile dish that encourages personalization – think creamy sour cream, sharp cheddar cheese, fresh green onions or chives, spicy jalapeños, crispy tortilla strips, and much more, allowing everyone at the table to create their perfect bowl.
✨ The Magic of Dutch Oven Cooking for Chili
A Dutch oven is more than just a pot; it’s a cherished culinary workhorse, especially for dishes like chili. Its heavy construction, excellent heat properties, and tight-fitting lid are key to developing the deep, rich flavors and tender textures that make this recipe so special:
- Even Heat Distribution: Crafted from heavy cast iron (often enameled), Dutch ovens excel at distributing heat uniformly across the bottom and sides. This prevents common cooking pitfalls like hot spots that can scorch chili, ensuring your ingredients cook consistently and gently simmer, extracting maximum flavor without burning.
- Superior Heat Retention: Once heated, a Dutch oven maintains its temperature remarkably well. This characteristic is vital for long, slow simmers, which are crucial for breaking down tougher ingredients, thoroughly melding spices, and developing that signature “cooked all day” depth of flavor that makes chili truly shine.
- Enhanced Flavor Development: The heavy base and sides are ideal for searing meats and sautéing vegetables to perfection. This process creates a flavorful fond – the browned bits that stick to the bottom of the pot. When liquids are added (like the stout and water in this recipe), this fond deglazes, releasing an incredible concentration of savory flavors directly into your chili.
- Moisture Retention: The heavy, tight-fitting lid of a Dutch oven effectively locks in moisture and steam. This prevents the chili from drying out during its simmer and ensures that all the rich liquids are absorbed back into the ingredients, concentrating their flavors and creating a perfectly balanced consistency.
- Versatility for Various Dishes: While this recipe primarily utilizes the stovetop, a Dutch oven’s ability to seamlessly transition from stovetop to oven (and vice versa) makes it incredibly versatile for a wide range of hearty, slow-cooked dishes beyond chili, such as stews, roasts, and even baking bread.
🍺 Key Ingredients and Smart Substitutions
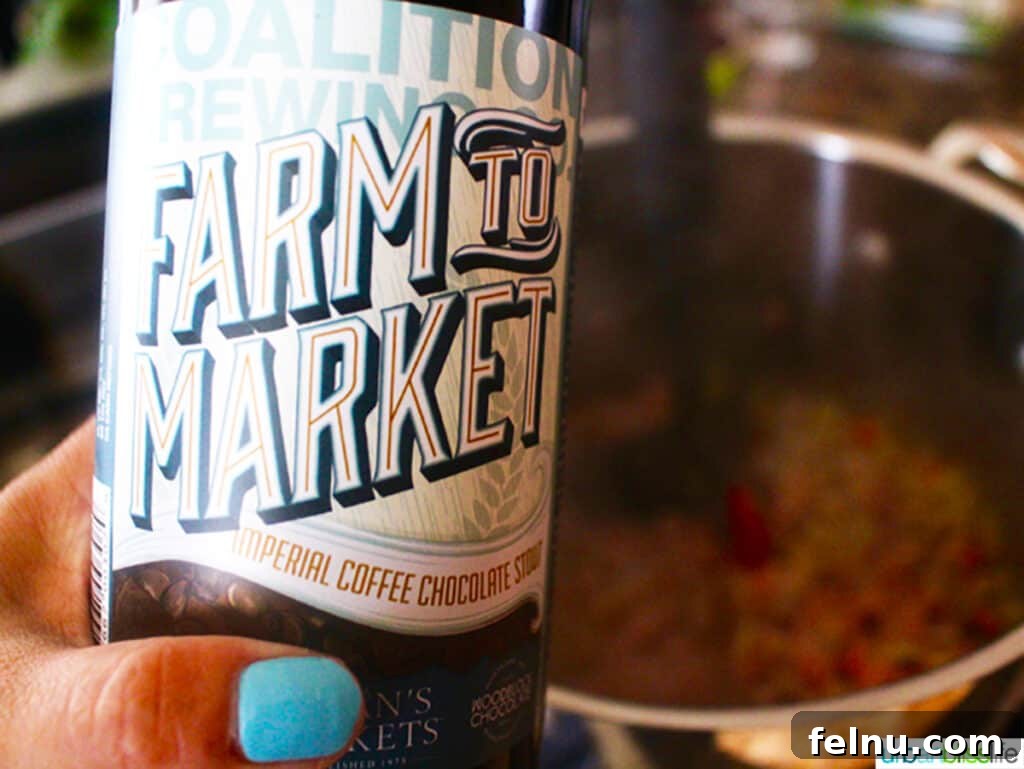
The success of any truly great chili lies in the quality and harmony of its ingredients. Here’s a closer look at the stars of this Dutch oven turkey chili, along with helpful notes and versatile substitution options to suit your taste and pantry:
- Ground Turkey: We specifically use lean ground turkey to make this chili a healthier, lighter option compared to traditional beef versions. Its mild flavor profile also readily absorbs the robust spices and rich liquids of the chili, making it incredibly versatile.
- Substitution: If you prefer a bolder or richer flavor, feel free to substitute with ground beef (80/20 for more flavor), ground pork, or a combination of different ground meats. For a delightful plant-based option, a high-quality plant-based ground meat alternative works wonderfully.
- Stout Beer: A dark stout, particularly a coffee or chocolate stout, is a transformative ingredient in this chili. It imparts a profound richness, a subtle sweetness, and a complex malty undertone that truly sets this recipe apart from others. Rest assured, the alcohol cooks off during simmering, leaving behind only incredible, deep flavor.
- Substitution: For a non-alcoholic alternative, a rich beef broth is an excellent choice, adding savory depth. You can also seek out non-alcoholic dark stout beers, which offer similar flavor profiles without the alcohol, or use a strong, dark-brewed coffee for a comparable layer of depth.
- Farro: This ancient grain is a standout ingredient, offering a delightful chewiness and hearty texture that elevates the chili beyond typical bean-only recipes. Farro is not only delicious but also rich in fiber and protein, significantly contributing to the meal’s nutritional value and making it more satisfying. You’ll typically find it in the grain aisle of your grocery store, often conveniently located near the rice or quinoa.
- Substitution: If farro is unavailable, or you prefer a different grain, pearl barley makes an excellent substitute, providing a similar chewy texture. Even cooked quinoa or brown rice (cooked separately and added at the end) can work. For a gluten-free option, wild rice is a fantastic alternative.
- Fresh Vegetables: This chili is intentionally packed with a colorful array of nutritious vegetables, including aromatic yellow onions, pungent fresh garlic, hearty baking potatoes, and vibrant sweet bell peppers. These ingredients add essential vitamins, minerals, varying textures, and a crucial fresh balance to the chili’s rich, savory base.
- Tip: Don’t hesitate to customize your veggie blend! Diced carrots, celery, zucchini, or even corn kernels can also be wonderful additions, boosting both flavor and nutrition.
- Bacon: A few slices of chopped bacon, skillfully rendered in the pot, provide a foundational layer of smoky, savory flavor. The rendered fat also serves as an ideal medium for cooking the aromatics, contributing significantly to the overall taste profile of the chili.
- Substitution: For a leaner option, simply omit the bacon and begin the cooking process with an additional tablespoon of olive oil. You can also use turkey bacon or incorporate a pinch of smoked paprika for a similar smoky essence without the meat.
- Black Beans & Tomatoes: These are classic chili staples for a reason, providing essential body, fiber, and a pleasant acidity that brightens the dish. We use both diced or stewed tomatoes for chunkiness and a can of concentrated tomato paste to build a robust, deep tomato base.
- Spices: The core spice blend of chili powder, ground cumin, salt, and black pepper creates that unmistakable, classic chili flavor profile we all love.
- Tip: Don’t hesitate to adjust the spices to your personal preference! For those who enjoy a little heat, a pinch of cayenne pepper or a dash of your favorite hot sauce can be added. A touch of smoked paprika can also enhance the smoky depth.
✅ Step-by-Step Guide to Your Best Chili Yet
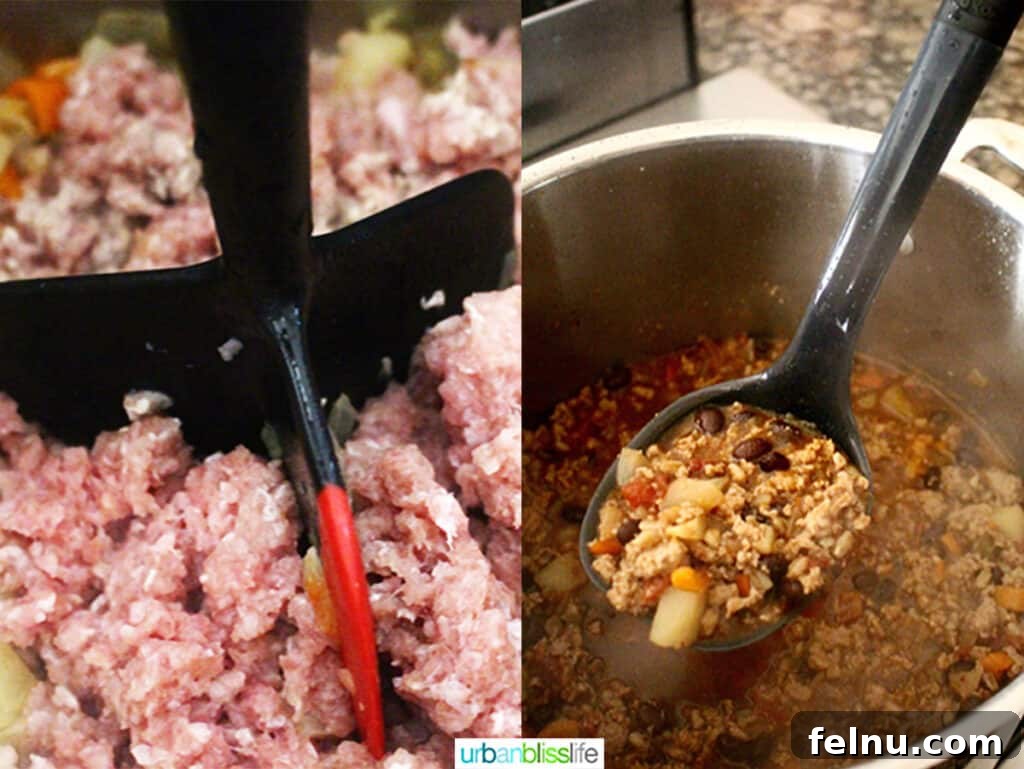
Creating this rich and hearty farro chili in your Dutch oven is a straightforward process, meticulously designed for maximum flavor with minimal fuss. Follow these simple, detailed steps to achieve culinary success and a truly memorable bowl of chili:
- Prepare the Farro: In a small saucepan, bring the chicken broth to a brisk boil. Once boiling, add the farro. Reduce the heat immediately to a gentle simmer and cook the farro according to the specific package directions (cooking times can vary, but it’s typically anywhere from 20-30 minutes), until it is tender yet retains a pleasant, chewy texture. Once cooked, drain any excess liquid and set the farro aside.
- Render Bacon and Sauté Aromatics: In your Dutch oven or a large, heavy-bottomed stockpot, heat the olive oil over medium heat. Add the chopped bacon and cook until it is just cooked through and crispy, usually about 3 minutes. Stir occasionally to ensure the bacon cooks evenly and prevents sticking to the pot. Using a slotted spoon, carefully remove the cooked bacon from the pot and set it aside to drain on a paper towel-lined plate, leaving the flavorful rendered fat in the pot.
- Build the Flavor Base with Veggies: To the same pot with the bacon fat (add a tiny bit more olive oil if needed to ensure adequate fat for sautéing), add the finely chopped yellow onion, minced garlic, diced potatoes, and chopped bell peppers. Sauté these vegetables for approximately two minutes, stirring frequently. This step is absolutely crucial for building a fragrant foundation for your chili and preventing the delicate garlic from burning.
- Brown the Turkey: Add the ground turkey to the pot with the sautéed vegetables. Cook for about 3-4 minutes, using a spoon or a meat chopper to break up the meat into small, even pieces as it browns. Continue cooking just until the turkey is no longer pink throughout.
- Incorporate Canned Goods and Spices: Stir in the rinsed and drained black beans, the can of diced or stewed tomatoes (undrained), and the concentrated tomato paste. Next, add all the dry spices: chili powder, ground cumin, salt, and black pepper. Stir all these ingredients together thoroughly, ensuring the spices are well distributed and coat everything evenly for maximum flavor infusion.
- Add Liquids and Deglaze: Carefully pour in the stout beer and one cup of water. Stir again, making sure to scrape up any delicious browned bits (the fond) from the bottom of the pot with your spoon. This deglazing step is where much of the chili’s rich flavor resides, incorporating it back into the liquid.
- Combine with Farro: Gently fold in the pre-cooked farro, distributing it evenly throughout the chili. This adds its unique texture and heartiness.
- Simmer to Perfection: Reduce the heat to low-medium and allow the chili to simmer gently, uncovered, for about 10 minutes. This crucial simmering period allows all the diverse flavors to meld and deepen beautifully. Toward the end, taste the chili and adjust any seasonings as needed – perhaps a pinch more salt, a dash of heat, or a touch of sweetness.
- Serve and Enjoy: Ladle the hearty, aromatic chili into individual bowls. Serve immediately with a generous spread of your favorite toppings (see suggestions above) and savor every comforting spoonful of your homemade Dutch oven turkey chili!
👨🍳 Pro Tips for Dutch Oven Chili Perfection
To truly elevate your Dutch oven chili from great to extraordinary, consider these expert tips that focus on technique, flavor development, and consistency:
- Master the Browning: Do not rush the browning of your bacon and ground turkey. This initial searing creates a rich “fond” (the browned bits on the bottom of the pot). When you deglaze the pot with liquids, this fond dissolves, infusing your chili with an incredible depth of savory, caramelized flavor that cannot be replicated.
- Thoughtful Flavor Layering: Follow the instructed order of adding ingredients. Sautéing aromatics (onions, garlic) before meat, and then stirring in spices before liquids, helps each component release its full flavor potential and build complexity from the ground up.
- Consistent Taste Testing: Always taste your chili towards the end of the simmering process, and don’t be shy about it! This is your chance to adjust salt, pepper, and other spices. A small pinch more chili powder, a dash of hot sauce for an extra kick, or even a tiny bit of sugar (to cut acidity) can perfectly balance the flavors.
- The Benefit of a Longer Simmer: While 10 minutes is sufficient for the flavors to meld, if you have the luxury of more time, a longer, gentler simmer (30-60 minutes on very low heat) can further deepen the complexity and richness of the chili. Just remember to stir occasionally and keep an eye on the consistency, adding a splash of broth or water if it becomes too thick.
- The Magic of Resting: Like many stews and braises, chili often tastes even better the next day. If possible, prepare your chili ahead of time, allow it to cool completely, and then gently reheat it. This resting period allows all the flavors to fully develop, marry, and integrate, creating a more harmonious and profound taste experience.
- Achieving Ideal Consistency: Chili consistency is a matter of personal preference. If your chili is too thick for your liking, simply add a little more water or broth, stirring until it reaches your desired texture. Conversely, if it’s too thin, let it simmer uncovered for a few more minutes to allow some liquid to evaporate and the chili to reduce and thicken.
🍽 Serving Suggestions and Topping Ideas
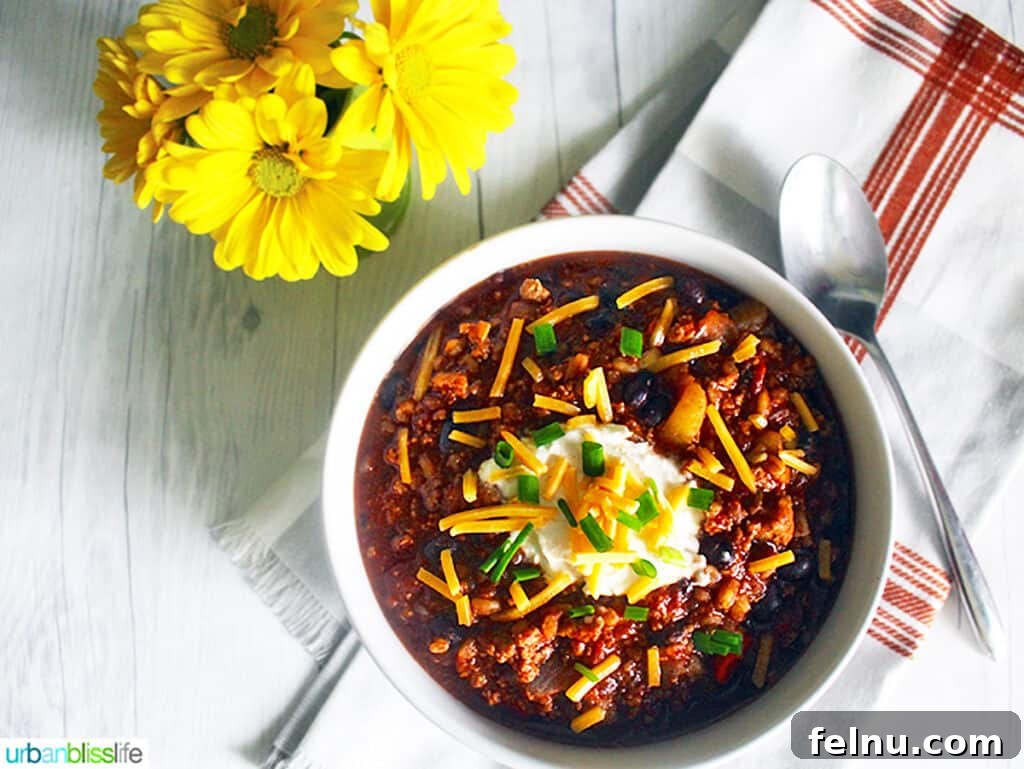
This hearty Dutch oven turkey chili is a satisfying meal in itself, but it truly shines when paired with the right accompaniments and a lavish spread of customizable toppings. Here are some ideas to complete your ultimate chili experience:
Perfect Pairings
Serve this delicious chili with a side of warm bread or a starchy accompaniment to soak up every last drop of its rich, flavorful sauce:
- Fluffy Air Fryer Biscuits: Quick, easy, and delightfully soft.
- Savory Garlic Parmesan Knots: A burst of garlic and cheese that perfectly complements chili.
- Robust Guinness Brown Bread: Its dense texture and malty flavor echo the stout in the chili.
- Fragrant Garlic Rosemary Focaccia: A wonderfully aromatic and soft bread for dipping.
- Soft Filipino Pandesal: A slightly sweet and airy roll that’s surprisingly good with savory dishes.
- Classic cornbread or cornbread muffins: The quintessential chili companion, offering a sweet and crumbly contrast.
- Steamed white or brown rice: A simple base to serve your chili over.
- Baked potatoes or sweet potatoes: A hearty vessel for a generous scoop of chili.
For a complete and balanced meal, consider adding a fresh green salad or a simple vegetable side:
- Quick and Easy Instant Pot Broccoli: A fast and healthy green vegetable.
- Perfectly Grilled Asparagus in Foil: Tender-crisp and subtly smoky.
- A crisp side salad with a light vinaigrette: Provides a refreshing counterpoint to the rich chili.
Top Your Chili to Perfection: The Ultimate Chili Bar!
The true beauty of chili lies in its incredible versatility with toppings. Set up a “chili bar” with an array of options and let everyone customize their bowl to their heart’s content!
- Creamy & Dairy Delights: A dollop of creamy sour cream, tangy Greek yogurt (for a healthier option), a generous sprinkle of shredded cheddar cheese, sharp Monterey Jack, or a flavorful blend of Mexican cheeses. A sprinkle of crumbled cotija cheese also adds a nice salty touch.
- Fresh & Zesty Herbs: Finely sliced green onions (scallions), abundant fresh cilantro (for cilantro lovers!), diced red onion for a pungent crunch, or delicate chives.
- Heat Seekers’ Haven: Thinly sliced fresh or pickled jalapeños for a spicy kick, a dash of your favorite smoky hot sauce, or a sprinkle of dried red pepper flakes for controlled heat.
- Crunch & Texture Boosters: Crumbled tortilla chips, classic corn chips (like Fritos), crunchy oyster crackers, or a sprinkle of crispy bacon bits (from the reserved bacon, if you saved some!) for an irresistible textural contrast.
- Avocado Goodness: Creamy diced avocado or a spoonful of homemade guacamole adds a rich, healthy fat and a cooling element.
- Unexpected & Bright Twists: A fresh squeeze of lime juice can brighten the entire dish, a dollop of sweet peach or mango salsa can offer a surprising fruity counterpoint, or a light sprinkle of smoked paprika can deepen the savory notes.
❄️ Storage and Meal Prep Made Easy
This Dutch oven turkey chili is not only delicious freshly made, but it’s also an excellent candidate for meal prepping, as its flavors often deepen and improve after a day or two in the refrigerator. Proper storage is key to enjoying your leftovers safely and deliciously.
Refrigeration Guidelines
Allow the chili to cool completely to room temperature before transferring it to an airtight container. This is crucial to prevent bacterial growth and maintain food safety. Once cooled, store the container in the refrigerator for up to four days. To reheat, gently warm portions on the stovetop over medium-low heat, stirring occasionally to ensure even heating, or simply use the microwave until heated through to your desired temperature.
Freezing Instructions
Yes, this hearty chili freezes beautifully, making it perfect for future quick meals! Once completely cooled, transfer the chili to freezer-safe containers or heavy-duty freezer bags. If using freezer bags, lay them flat on a baking sheet to freeze, which allows for easy stacking and quicker thawing later. This chili can be safely stored in the freezer for up to one month without significant loss of quality. To thaw, transfer the frozen chili to the refrigerator overnight. Once thawed, reheat gently on the stovetop or in the microwave as directed for refrigerated leftovers. For a quicker thaw in a pinch, you can place a freezer bag of chili in a bowl of cold water (changing the water every 30 minutes) or reheat from frozen on the stovetop over very low heat, stirring frequently.
Pro Tip for Meal Prep: Portion out individual servings of chili into smaller freezer-safe containers before freezing. This allows you to grab and reheat just the right amount for a quick, wholesome meal whenever you need it!
👩🏻🍳 Frequently Asked Questions About Dutch Oven Chili
Here are answers to some of the most common questions you might have about preparing and enjoying this delicious Dutch oven turkey chili:
What can I use instead of beer in this recipe?
If you prefer to avoid alcohol, you have several excellent options to maintain the chili’s rich flavor profile. A robust beef broth is a fantastic substitute, adding savory depth. You can also look for non-alcoholic stout beer alternatives, which are specifically crafted to mimic the malty notes without the alcohol. Alternatively, a strong, dark-brewed coffee can impart a similar layer of depth and bitterness that beautifully complements the other ingredients.
How do I store leftovers?
To ensure optimal freshness and food safety, always allow your chili to cool completely to room temperature before storing. Once cooled, transfer it to an airtight container and place it in the refrigerator. Leftover chili will remain fresh and delicious for up to four days when stored properly.
Can I freeze this chili?
Absolutely! This Dutch oven turkey chili is very freezer-friendly, making it an ideal choice for meal prepping. Once cooled, store the chili in a freezer-safe container or a heavy-duty freezer bag. It can be kept in the freezer for up to one month. When you’re ready to enjoy it, simply thaw it in the refrigerator overnight and then reheat gently on the stovetop or in the microwave.
What type of farro should I use for the best results?
Most grocery stores primarily stock pearled or semi-pearled farro, which is partially hulled to reduce cooking time, typically ranging from 20-30 minutes. Whole farro, which retains its complete hull, is also an option but requires a longer cooking time and often benefits from pre-soaking. For convenience and consistent results in this recipe, pearled or semi-pearled farro is generally recommended. Always follow the specific cooking instructions on your farro package for the best texture.
Can I make this chili vegetarian or vegan?
Yes, this recipe is quite adaptable for vegetarian or vegan diets! To make it vegetarian, replace the ground turkey with a plant-based ground meat substitute, an increased amount of beans (such as kidney beans, pinto beans, or extra black beans), or hearty diced mushrooms. For a vegan version, additionally, ensure you substitute vegetable broth for chicken broth, and verify that your chosen stout beer (or its non-alcoholic alternative) is vegan-friendly. Remember to completely omit the bacon and start the sautéing process with just olive oil.
How can I adjust the spice level?
The spice level can be easily adjusted to your preference. For a milder chili, stick to the recommended amounts of chili powder and cumin. If you enjoy more heat, consider adding a pinch of cayenne pepper, a dash of your favorite hot sauce, or a few slices of fresh jalapeño to the pot while simmering. You can also pass extra hot sauce or fresh chili slices at the table for individual customization.
⏲ Essential Kitchen Tools

To successfully bring this delicious Dutch oven chili to life in your kitchen, you’ll need a few key tools that simplify the process and ensure excellent results:
- Dutch Oven: The star of this recipe! A sturdy 4-quart Dutch oven or a larger 6-quart Dutch oven is ideal. Its heavy construction provides ample space for all ingredients and ensures even heat distribution, critical for perfectly simmered chili.
- Ground Meat Chopper: This incredibly handy ground meat chopper and turner is a game-changer for efficiently breaking up ground turkey (or any ground meat) while it cooks. It ensures even browning and prevents large clumps, contributing to a better texture in your chili.
- Ladle: A sturdy metal or silicone ladle is an absolute must-have for serving up generous, steaming portions of your rich and comforting chili without making a mess.
- Cutting Board and Sharp Knife: For preparing all the fresh vegetables—chopping onions, mincing garlic, dicing potatoes, and slicing bell peppers—a reliable cutting board and a sharp chef’s knife are indispensable kitchen staples. For those looking to speed up prep time significantly, a Vegetable Chopper can be a fantastic alternative.
- Small Saucepan: Essential for cooking the farro separately, ensuring it’s perfectly tender before being added to the main chili pot.
🍲 More Comforting Recipes to Explore
If you love the hearty and comforting flavors of this Dutch oven chili, you’ll surely enjoy exploring these other equally delicious and soul-satisfying recipes, perfect for cozy meals and family gatherings:
- Instant Pot Turkey Chili
- Beef Mechado (Filipino Beef Stew)
- Dairy-Free One Pot Cheeseburger Pasta
- Dutch Oven Pot Roast
Did you make this recipe? We’d love to hear from you! Don’t forget to leave a 5-Star 🌟🌟🌟🌟🌟 rating in the recipe card below, and share your thoughts in a comment further down the page. Your feedback is greatly appreciated!
Recipe Card: Dutch Oven Turkey Chili with Stout and Farro
Marlynn Schotland
15 mins
30 mins
45 mins
8

Equipment
- Dutch Oven (4 or 6-quart)
- Ground Meat Chopper
- Ladle
- Cutting Board & Sharp Knife (or Vegetable Chopper)
- Small Saucepan
Ingredients
- 2 cups chicken broth (approximately 1 14.5-ounce can)
- 1 cup farro
- 1 tablespoon olive oil
- 3 slices bacon, chopped into ½” pieces
- ½ small yellow onion, finely chopped
- 3 garlic cloves, minced
- 1 cup finely chopped bell peppers (any color)
- 1 medium baking potato, diced into small cubes
- 1 pound ground turkey
- 1 can (14 oz) black beans, rinsed and drained
- 1 can (14 oz) diced or stewed tomatoes
- 1 can (8 oz) tomato paste
- 2 teaspoons chili powder
- 1 teaspoon ground cumin
- 1 teaspoon salt
- 1 teaspoon black pepper
- 1 cup coffee stout, or any dark stout beer (see notes for substitutions)
- 1 cup water
- OPTIONAL TOPPINGS: sour cream, shredded cheddar cheese, green onions, fresh cilantro, diced avocado, tortilla chips
Instructions
-
In a small saucepan, bring the chicken broth to a brisk boil. Once boiling, add the farro. Reduce the heat immediately to a gentle simmer and cook the farro according to the specific package directions (cooking times can vary, but it’s typically anywhere from 20-30 minutes), until it is tender yet retains a pleasant, chewy texture. Once cooked, drain any excess liquid and set the farro aside.
-
In your Dutch oven or a large, heavy-bottomed stockpot, heat the olive oil over medium heat. Add the chopped bacon and cook until it is just cooked through and crispy, usually about 3 minutes. Stir occasionally to ensure the bacon cooks evenly and prevents sticking to the pot. Using a slotted spoon, carefully remove the cooked bacon from the pot and set it aside to drain on a paper towel-lined plate, leaving the flavorful rendered fat in the pot.
-
To the same pot with the bacon fat (add a tiny bit more olive oil if needed to ensure adequate fat for sautéing), add the finely chopped yellow onion, minced garlic, diced potatoes, and chopped bell peppers. Sauté these vegetables for approximately two minutes, stirring frequently. This step is absolutely crucial for building a fragrant foundation for your chili and preventing the delicate garlic from burning.
-
Add the ground turkey to the pot with the sautéed vegetables. Cook for about 3-4 minutes, using a spoon or a meat chopper to break up the meat into small, even pieces as it browns. Continue cooking just until the turkey is no longer pink throughout.
-
Stir in the rinsed and drained black beans, the can of diced or stewed tomatoes (undrained), and the concentrated tomato paste. Next, add all the dry spices: chili powder, ground cumin, salt, and black pepper. Stir all these ingredients together thoroughly, ensuring the spices are well distributed and coat everything evenly for maximum flavor infusion.
-
Carefully pour in the stout beer and one cup of water. Stir again, making sure to scrape up any delicious browned bits (the fond) from the bottom of the pot with your spoon. This deglazing step is where much of the chili’s rich flavor resides, incorporating it back into the liquid.
-
Gently fold in the pre-cooked farro, distributing it evenly throughout the chili. This adds its unique texture and heartiness.
-
Lower the heat to low-medium and allow the chili to simmer gently, uncovered, for about 10 minutes. This crucial simmering period allows all the diverse flavors to meld and deepen beautifully. Toward the end, taste the chili and adjust any seasonings as needed – perhaps a pinch more salt, a dash of heat, or a touch of sweetness.
-
Ladle the hearty, aromatic chili into individual bowls. Serve immediately with a generous spread of your favorite toppings (see suggestions above) and savor every comforting spoonful of your homemade Dutch oven turkey chili!
Notes
Meat Options: While ground turkey is used here for a leaner profile, feel free to substitute with ground beef, ground pork, or a plant-based alternative.
Farro Alternatives: If farro isn’t available, pearl barley, brown rice, or quinoa can be used as substitutes. Cook according to their package directions.
Beer Substitutions: For the richest flavor, a coffee stout is recommended. However, any dark stout beer works well. For non-alcoholic options, use beef broth, non-alcoholic stout beer, or strong brewed coffee.
Topping Ideas: Enhance your chili with a variety of toppings like sour cream, shredded cheddar cheese, sliced jalapeños, fresh green onions, cilantro, diced avocado, or crunchy tortilla chips.
Storage Instructions: Allow the chili to cool completely before transferring to an airtight container. It can be stored in the refrigerator for up to four days or frozen in a freezer-safe container for up to one month.
Nutrition Information (Approximate Per Serving)
Carbohydrates: 43g,
Protein: 22g,
Fat: 4g,
Saturated Fat: 1g,
Polyunsaturated Fat: 1g,
Monounsaturated Fat: 2g,
Trans Fat: 0.01g,
Cholesterol: 32mg,
Sodium: 842mg,
Potassium: 863mg,
Fiber: 9g,
Sugar: 6g,
Vitamin A: 1172IU,
Vitamin C: 35mg,
Calcium: 59mg,
Iron: 4mg
Nutrition information is automatically calculated and should be considered an approximation.
Tried this recipe?
Please leave a star rating and comment! Then snap a pic of your delicious dish and share it on social media. Don’t forget to tag @UrbanBlissLife and use the hashtag #UrbanBlissLife!